This post may contain affiliate links. As an amazon associate, I earn from qualifying purchases. See my full Disclosure Policy for details.

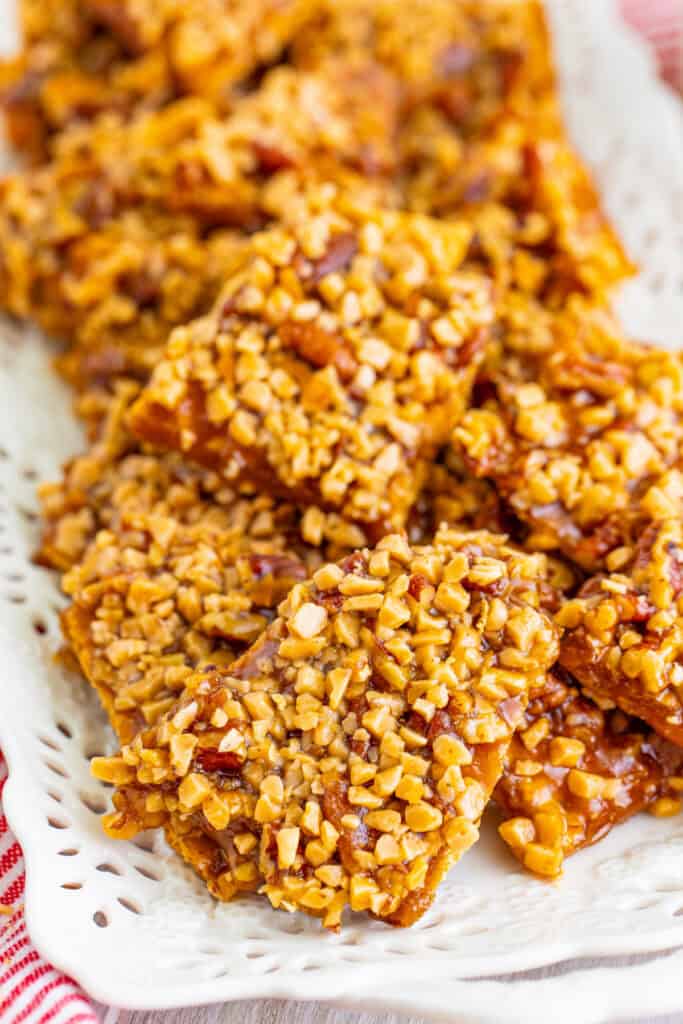
Sweet, buttery, crunchy Toffee Graham Cracker Pralines ⭐ So easy to make and perfect for gifting or holiday trays. You will love this quick candy!
Pin this now to find it later
Pin It⭐ Why You’ll Love This Recipe
- These pralines deliver the classic flavor of candy pralines without the long stovetop process.
- The buttery toffee coating gives this pralines recipe a sweet, crunchy texture that people love.
- You only need a few pantry staples to make a batch of candy pralines quickly.
- If you have ever wondered what pralines are, this recipe is a good place to start.
- This is one of those pralines recipes that works for holidays, snacking, or gifting.
- Anyone who wants a beginner-friendly praline recipe will appreciate how quickly these come together.
🛒 Ingredients & Substitutions
- Graham crackers
- salted butter – substitute with unsalted butter and add ¼ teaspoon salt
- dark brown sugar – substitute with light brown sugar for a lighter flavor
- chopped pecans
- English toffee bits – use chocolate-coated toffee bits if preferred
✨ Variations
- Swap pecans with almonds or walnuts for a twist on classic pralines.
- Add a sprinkle of flaky salt on top for a sweet, salty finish.
- Use chocolate-coated toffee bits for a richer candy praline flavor.
- Drizzle melted chocolate over the cooled pralines for a more decadent treat.
🔥 Tips
- Stir the caramel mixture constantly for the best texture.
- Break the pralines after they have cooled completely for cleaner edges.
- A silicone spatula makes it easier to press the toffee bits into the caramel.
- If you are new to making candy pralines, prep all ingredients first so the process goes smoothly.
❓ FAQs
Pralines are a type of candy made with sugar and nuts, and this easy version gives you the same flavor. These pralines are a beginner friendly way to learn what are pralines without a long cooking time.
They have the same caramel nut flavor as candy pralines, but with a quicker method that uses graham crackers as the base.
Some pralines recipes can be fussy, but this version is simple and uses everyday ingredients.
Yes, drizzle melted chocolate on top once the pralines cool, or use chocolate toffee bits.
Yes, you can double it easily. Use two baking sheets so the caramel spreads evenly.
No. Unlike traditional candy pralines, this version does not require temperature monitoring.
Graininess happens if the sugar is not fully melted. Stir constantly to keep the caramel smooth.
They soften slightly under the caramel but still keep a nice bite.
🍽️ Other Recipes You May Enjoy
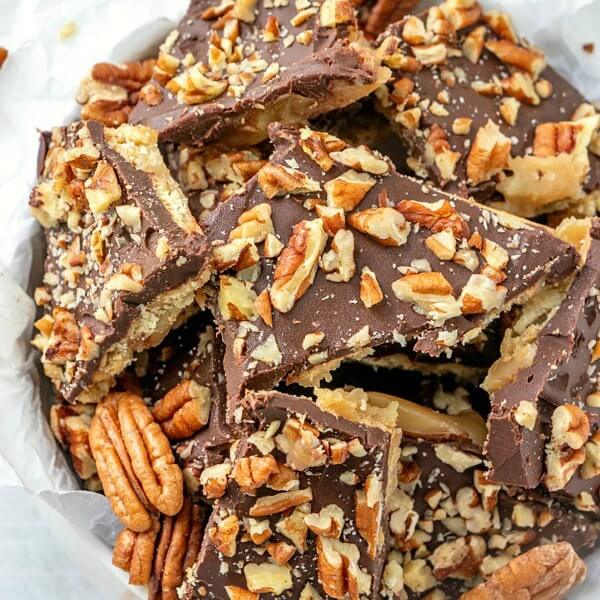

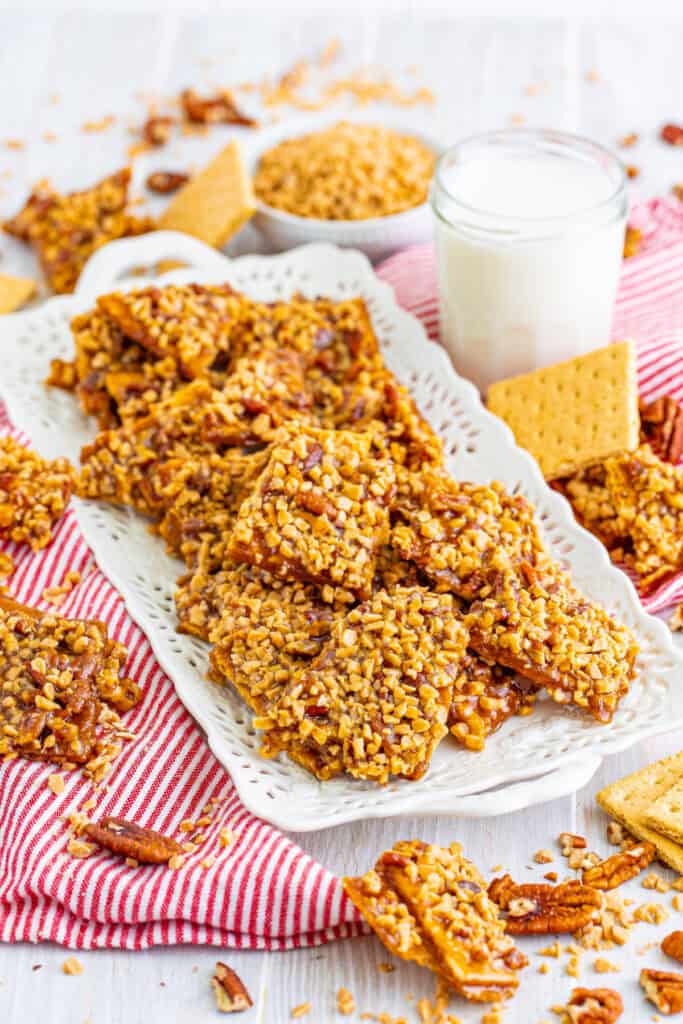
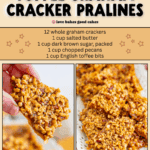
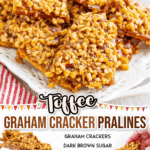
Toffee Graham Cracker Pralines
Would you like to save this?
Equipment
- medium saucepan
- rubber spatula (for pressing toffee bits)
Ingredients
- 12 whole graham crackers
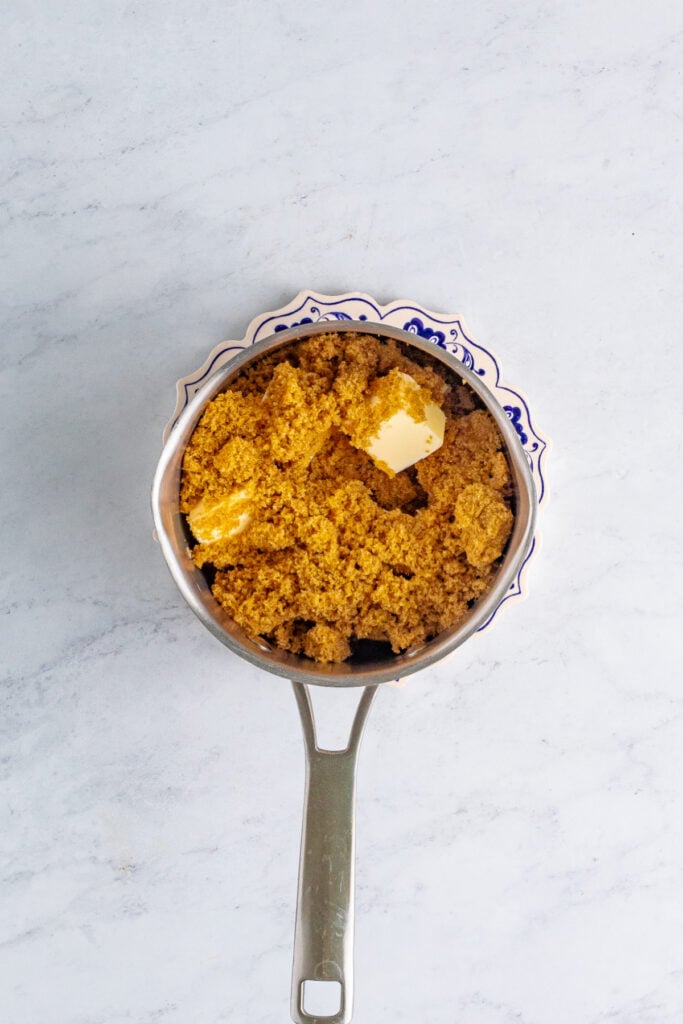
- 1 cup salted butter
- 1 cup dark brown sugar, packed
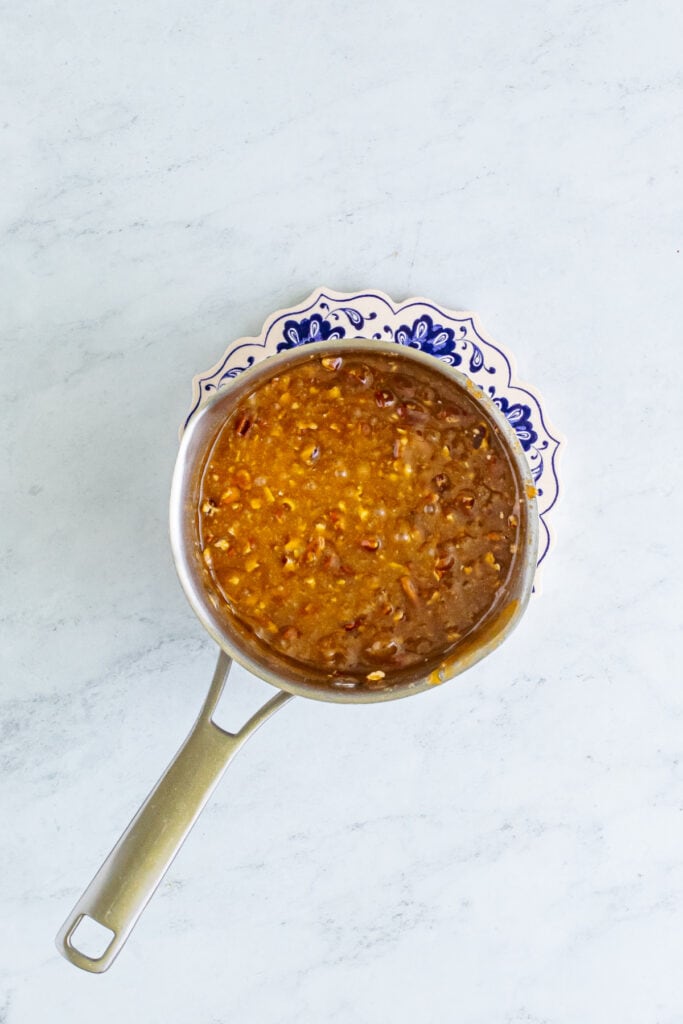
- 1 cup chopped pecans
- 1 cup English toffee bits
Instructions
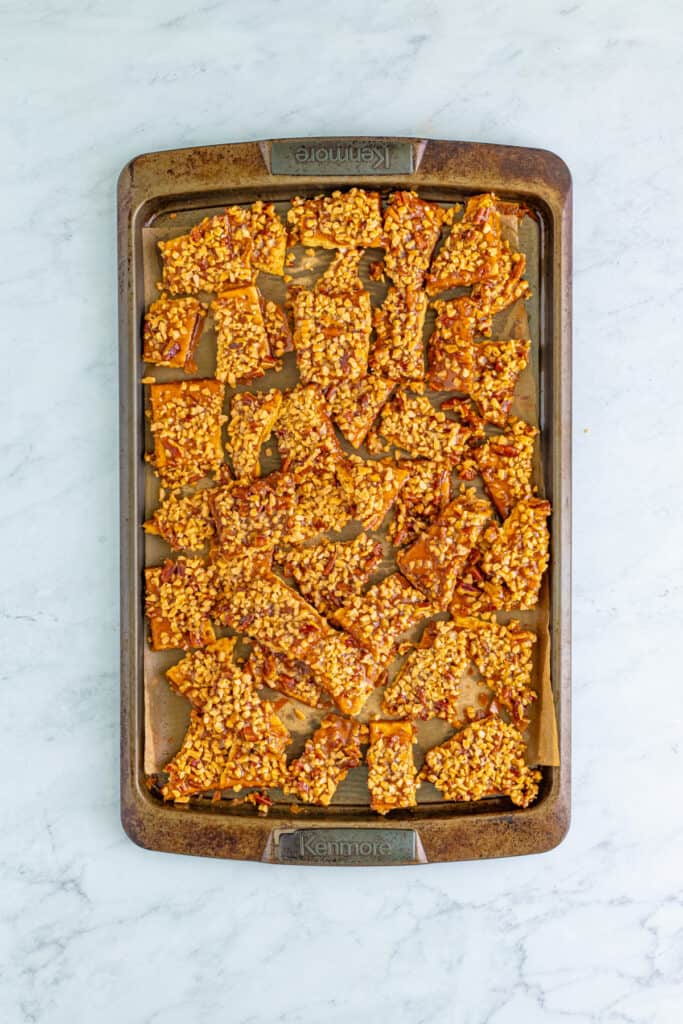
- Preheat the oven to 350°F. Line a baking sheet with parchment paper.
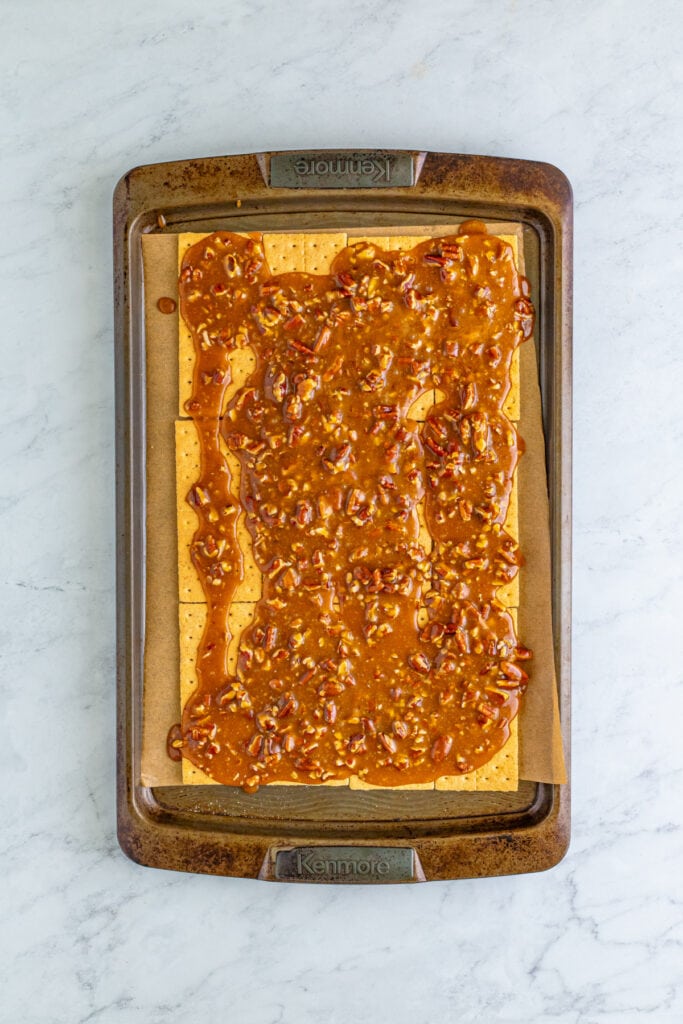
- Arrange the graham crackers in a single layer on the prepared baking sheet so they touch.12 whole graham crackers
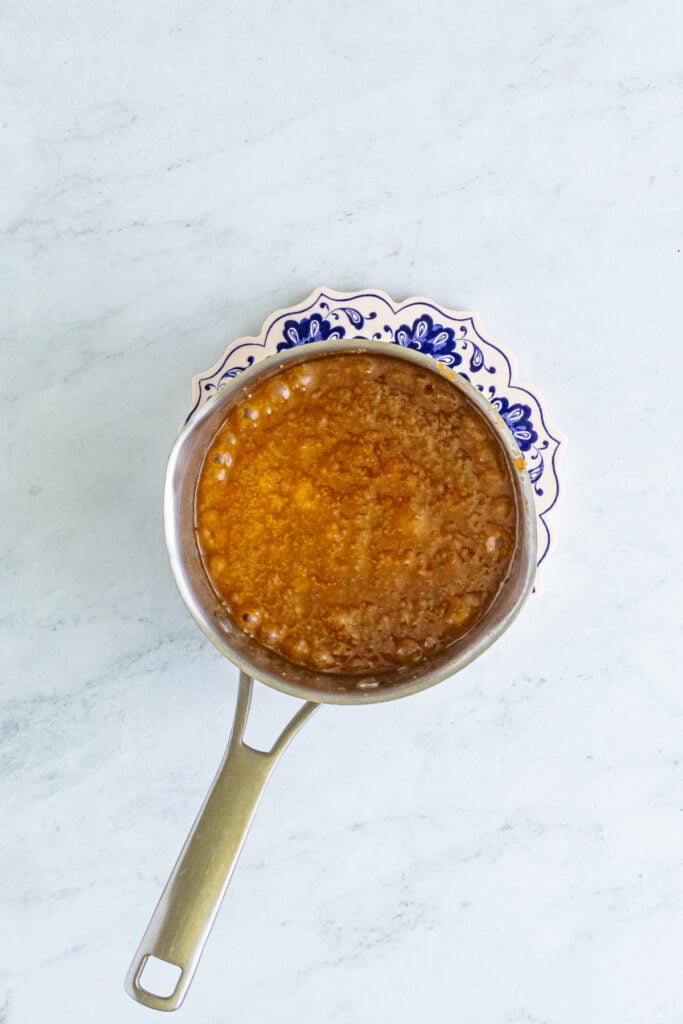
- Add the butter and brown sugar to a medium saucepan. Stir constantly over medium heat until the sugar dissolves and the butter melts.1 cup salted butter, 1 cup dark brown sugar
- Continue stirring and bring the mixture to a full boil. Boil for 1 minute while stirring.
- Stir in the pecans, then immediately pour the caramel mixture evenly over the graham crackers. It will not cover them perfectly and that is fine.1 cup chopped pecans
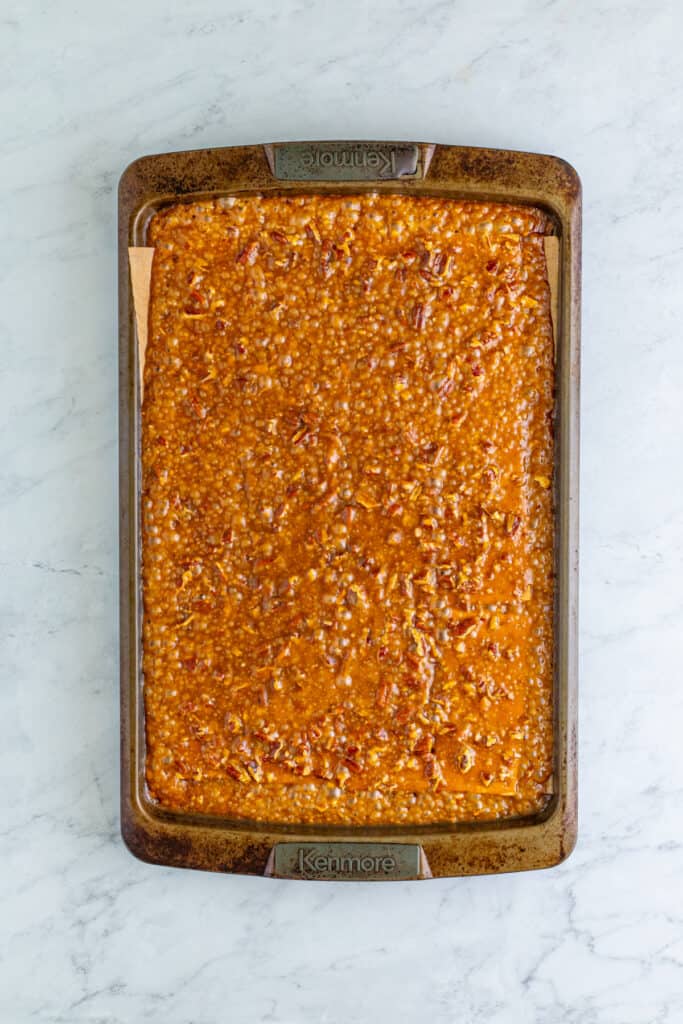
- Bake for 10 minutes.
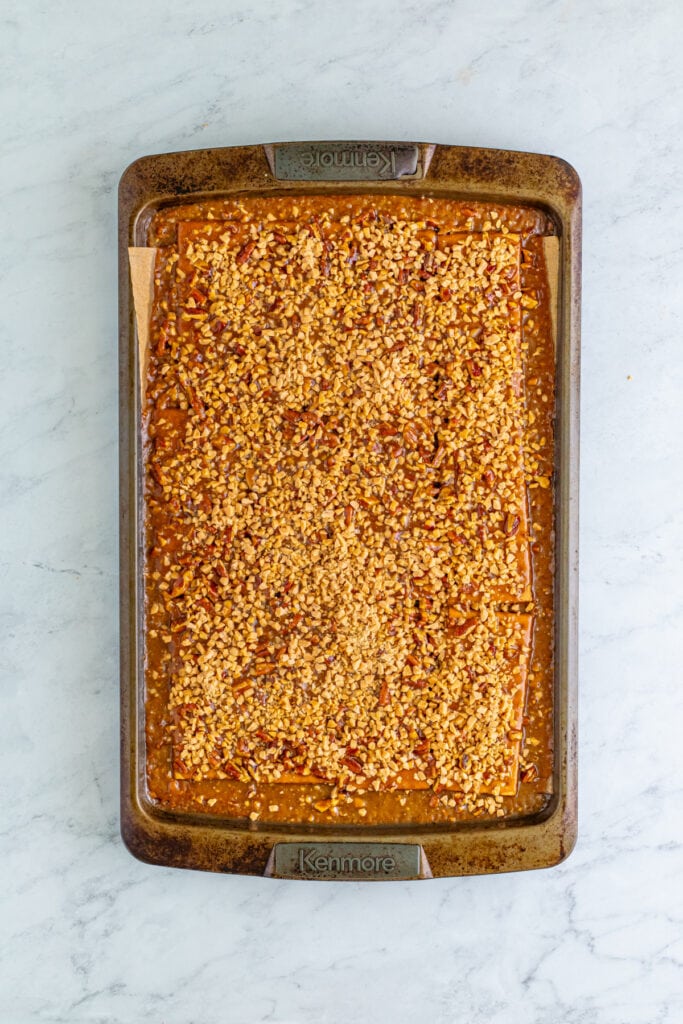
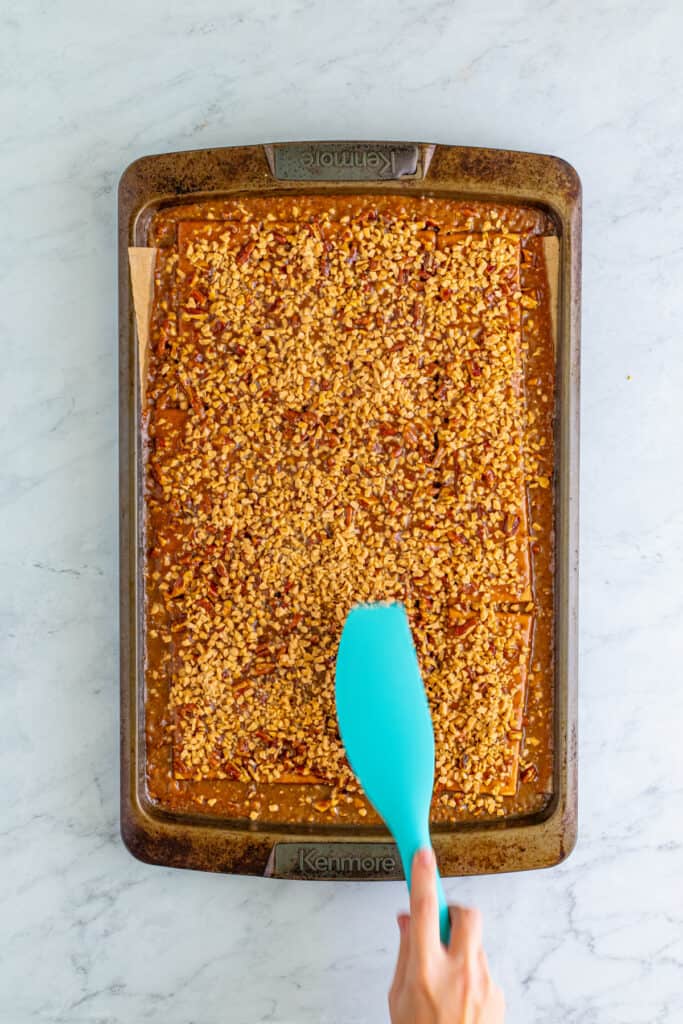
- Remove from the oven and sprinkle the toffee bits over the hot caramel. Use a spatula to gently press them in.1 cup English toffee bits
- Let cool to room temperature, then break into pieces. For the cleanest break, let them rest overnight.
Notes
🥡 STORAGE
- Store pieces in an airtight container for up to 1 week at room temperature.
♨️ REHEATING
- No reheating needed. Serve as is.
❄️ FREEZING
- Freeze pieces in a freezer-safe bag for up to 3 months.
💡 TIPS FOR BEST RESULTS
- Let the pralines sit overnight for easier breaking.
- Press the toffee bits in with a spatula, not your hands, since the caramel is very hot.
- Do not stir toffee bits into the caramel mixture.
🍳 ALTERNATE COOKING METHODS
- Make only on the stovetop, as written. Baking is required to evenly set the caramel coating.
♻️ LEFTOVERS
- Use leftovers as a topping for brownies, ice cream, yogurt, or holiday snack mixes.
📝 NOTES
- Add a sprinkle of flaky salt for a sweet-salty finish.
- Replace pecans with almonds or walnuts if preferred.
- Break the candy into small or large pieces, depending on how you plan to serve it.
Nutrition
Nutrition information is automatically calculated, so should only be used as an approximation.

Can I use cinnamon graham crackers?
Yes. That will work fine.
Jamie, I have a question. When I make this (not your recipe but the same), I doesn’t have the glossy finish yours does. It gets a dull finish and isn’t crispy. Would you cook the butter and sugar longer? I was thinking like a toffee consistency.
Hey, Karen! Let’s see if I can help.
To get a glossy finish on toffee, it all comes down to preventing sugar crystals and letting it cool correctly. Here are the key tips for shiny, smooth toffee:
• Cook to the right temperature – Bring the toffee to 300°F (hard crack stage). Undercooking or overcooking can make the surface look dull.
• Stop stirring once it boils – Stir only until the sugar dissolves. After that, let it boil on its own. Stirring while it’s bubbling can cause crystals that ruin the shine.
• Prevent crystals on the pan – Brush down the sides with a wet pastry brush, or add 1 tablespoon of corn syrup to help keep the sugar smooth.
• Pour quickly and smoothly – Pour in one even motion and avoid scraping the pan. Scraping can introduce crystallized sugar back into the toffee.
• Avoid humidity – Moisture in the air can cause dull, sticky toffee. If possible, make candy on a dry day.
• Let it cool at room temperature – Don’t refrigerate it. Cooling too fast can cause a matte finish.
• If adding chocolate, sprinkle it on while the toffee is still hot so it melts smoothly and spreads with a glossy look.
Follow these steps and your toffee should set with that beautiful, shiny finish!