This post may contain affiliate links. As an amazon associate, I earn from qualifying purchases. See my full Disclosure Policy for details.

Want to make stunning Marbled Easter Eggs? This easy oil and dye method creates beautiful, swirled designs in minutes! Perfect for Easter fun! 🌸🥚✨

Pin this now to find it later
Pin ItMarbled Easter Eggs Using Oil
Add a unique twist to your Easter eggs with this fun and easy marbling technique using food dye and oil! Unlike traditional dyeing, this method creates beautiful swirls and patterns in seconds.
⭐ Why You’ll Love This Recipe
- Quick & Easy – Takes just minutes to create stunning eggs.
- Minimal Supplies – Uses simple kitchen ingredients.
- Customizable – Choose your favorite colors for a unique look.
- Great for All Ages – A fun Easter craft for kids and adults alike!
🛒 Ingredients & Substitutions
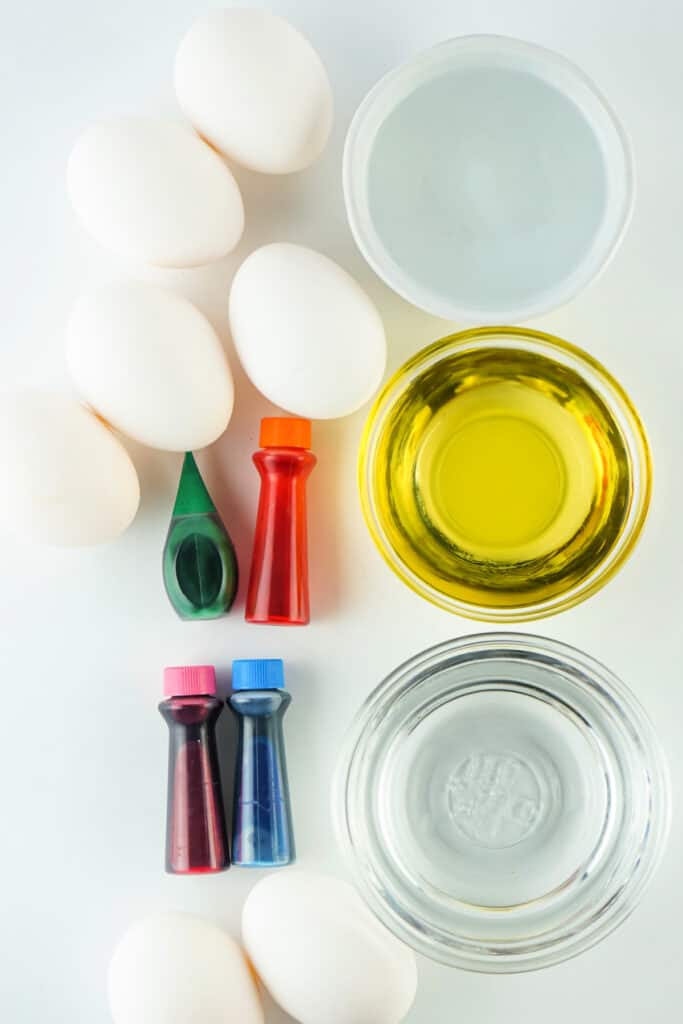
- hard-boiled eggs
- boiling water
- distilled white vinegar
- water-based food dye – Gel dye works also but requires extra stirring.
- cooking oil – Any oil (vegetable, olive, avocado) works.
✨ Variations
- Multicolor Marbling: Dip an egg into two different colors for a layered effect.
- Metallic Touch: Use gold or silver edible paint after drying for a luxe look.
- Pastel Shades: Use fewer dye drops for a softer color.

🔥 Tips for Success
- Do not soak eggs – this prevents marbling.
- Keep water level low – eggs should only be partially submerged.
- Wipe the dye off immediately to keep the swirl effect.
- Use a darker dye for more contrast.

❓ FAQs
Yes! The colors will appear slightly different but still beautiful.
Make sure you streak oil on before dipping, and don’t leave them in the dye too long.
Keep them in the fridge and consume them within a week if you plan to eat them.
Yes, hot water helps the dye adhere better, creating vibrant colors.
Yes, but the oil will start to break up over time. Stir before each use to keep the marbling effect.
Ensure the egg is completely dry before starting. Also, make sure the dye is well-mixed before dipping.
Leaving the egg in the dye too long will result in a solid color instead of a marbled effect.
Yes! You can roll the egg in one color first, let it dry, then repeat with another for a layered effect.
Keep them in an egg carton in the fridge if they are for eating. If they’re for decoration, store them in a cool, dry place.

🍽️ Other Recipes You May Enjoy

Marbled Easter Eggs
Would you like to save this?
Materials
- mixing bowl one per color
- paper towels
- rubber gloves
- spoons
Ingredients
- 12 hard-boiled eggs, room temperature, dry
- ½ cup boiling water, per color
- 1 tablespoon cooking oil, + extra for streaks
- ½ tablespoon white distilled vinegar, per color
- 10-20 drops food dye, per color
Instructions
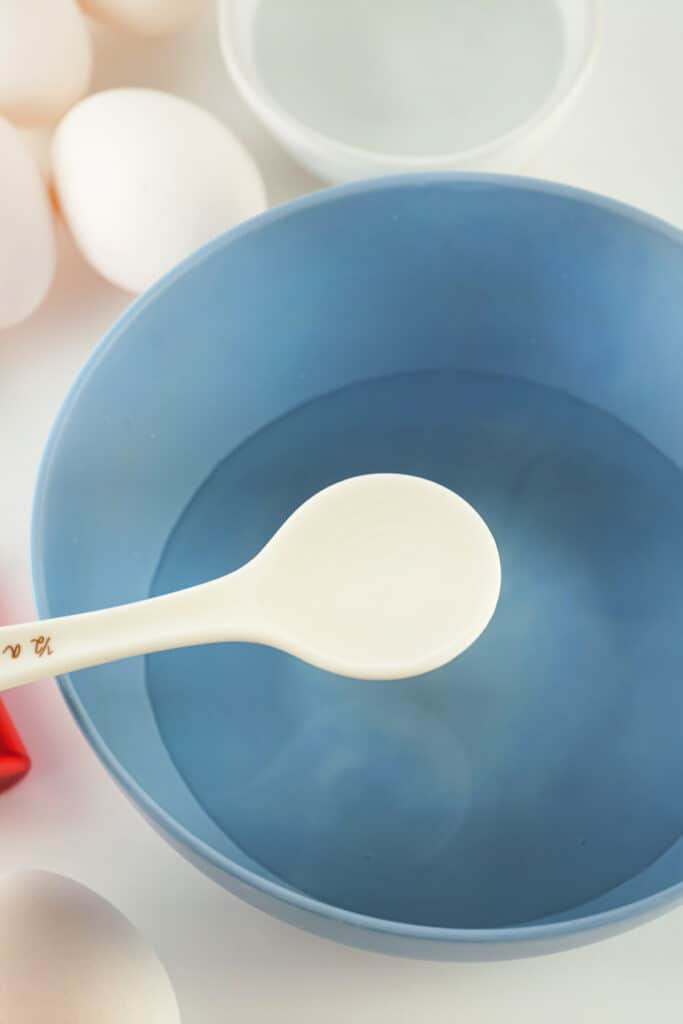
- Prepare the Dye: Use one bowl per color, adding 1/2 cup boiling water, 1/2 tbsp vinegar, and 10-20 drops of dye (fewer for dark colors, more for light). Stir well.
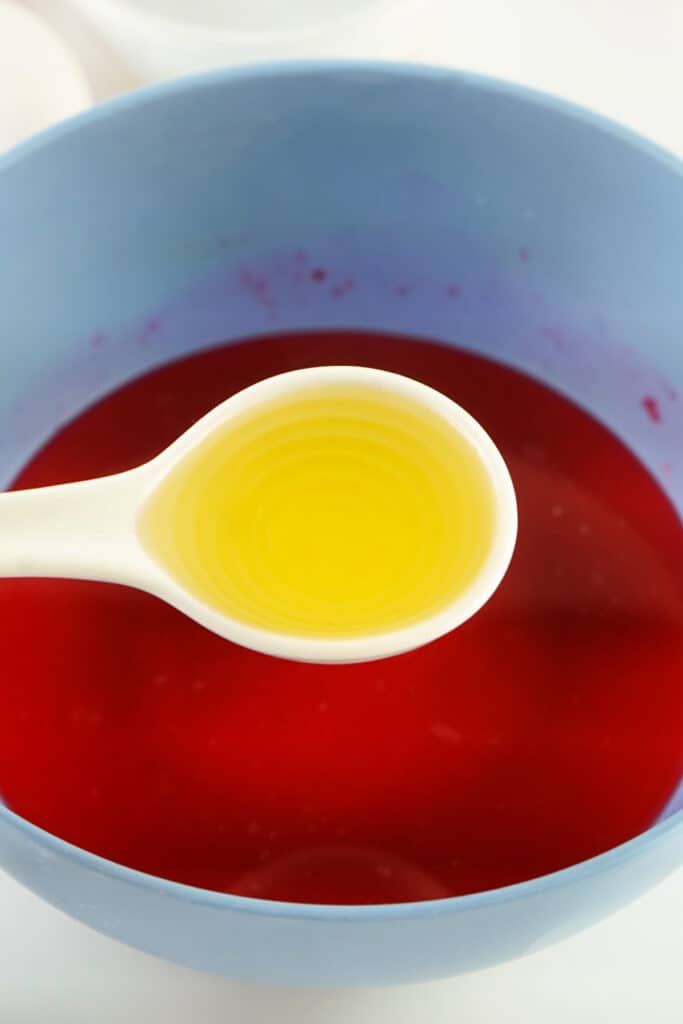
- Add Oil: Mix 1 tablespoon of cooking oil into each bowl, leaving a small amount aside.
- Oil the Eggs: Lightly streak oil onto each egg with a finger or brush, avoiding full coverage.
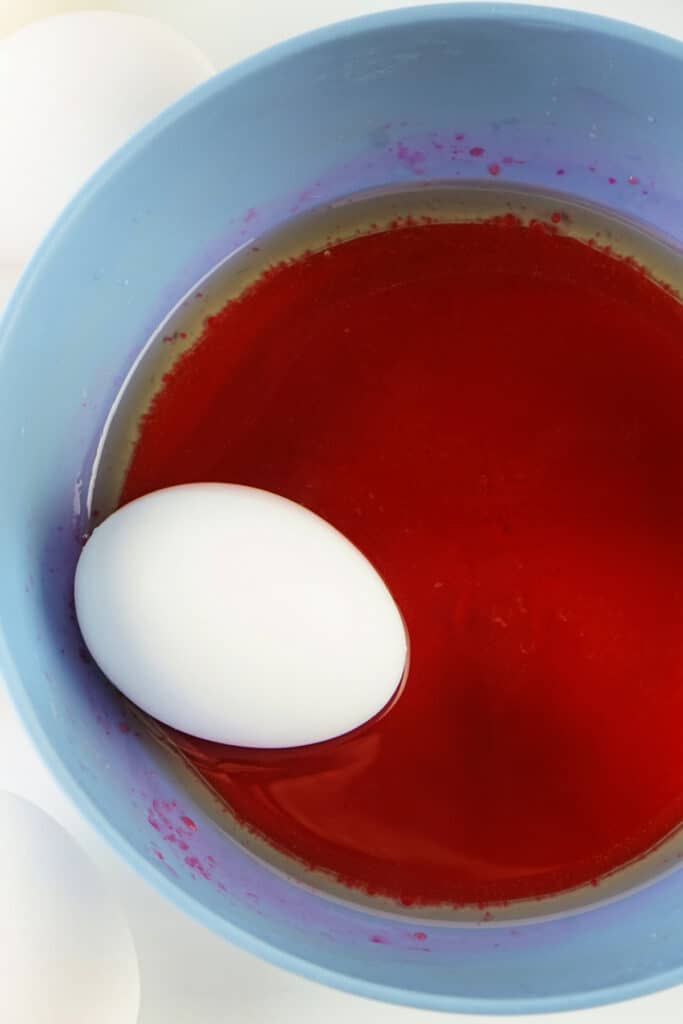
- Dye the Eggs: Stir the dye and oil mixture, then quickly roll the egg in it. Remove immediately and wipe dry.
- Dry: Let eggs sit in a carton for 5 minutes before handling further.
Notes
- Egg Preparation: Make sure your eggs are at room temperature and completely dry before starting to ensure the dye adheres properly.
- Dye Strength: Darker colors require fewer drops (10-15), while lighter colors need more (15-20) for a bold effect.
- Oil Application: Light streaks of oil are key – too much oil can prevent the dye from sticking, and too little won’t create enough marbling.
- Quick Dipping: Roll the egg quickly in the dye mixture and remove it immediately to achieve the marbled effect. Letting it sit too long will fully color the egg.
- Cleaning Up: Use gloves to avoid staining your hands, and cover your work surface to prevent messes.
- Alternative Oils: Any cooking oil works, including vegetable, olive, and avocado oil.
- Storing the Eggs: If you plan to eat them, store dyed eggs in the refrigerator and consume them within a week. If using for decoration, keep them in a dry place.
- Works on Brown Eggs: The marbling effect will be more subtle but still beautiful.
Nutrition
Nutrition information is automatically calculated, so should only be used as an approximation.