This post may contain affiliate links. As an amazon associate, I earn from qualifying purchases. See my full Disclosure Policy for details.

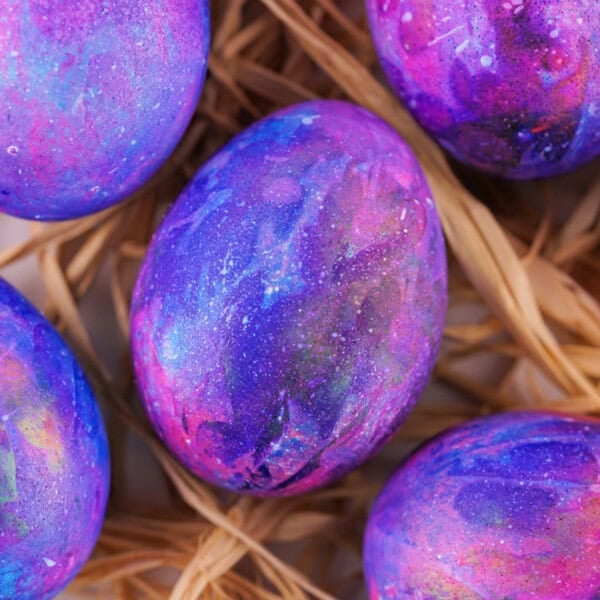
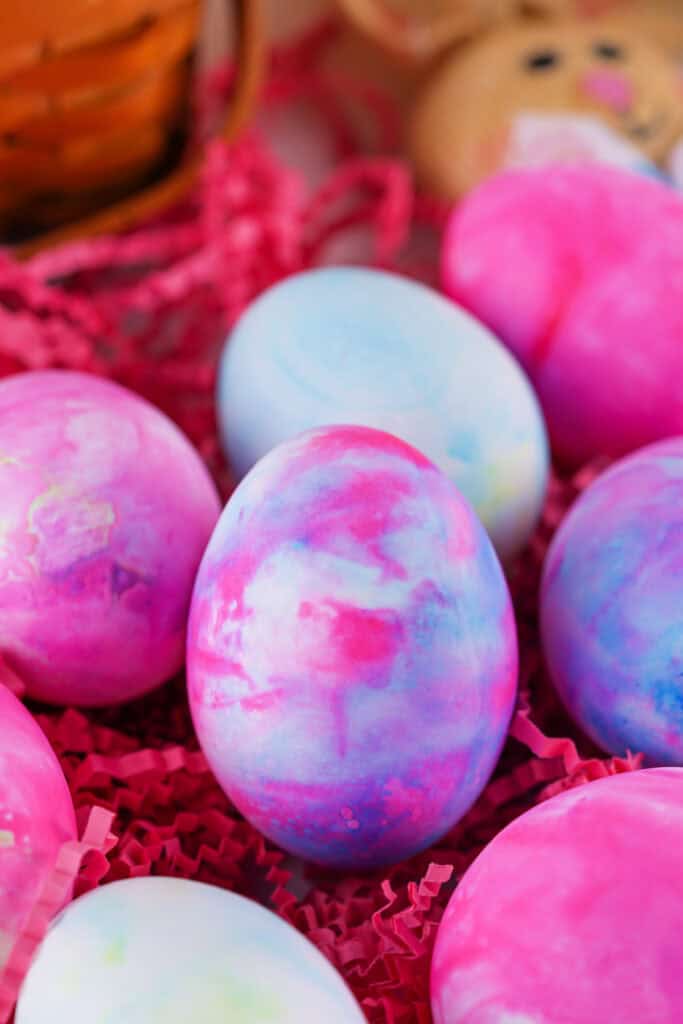
Try Shaving Cream Dyed Easter Eggs for a fun and creative way to decorate! 🎨 Simply swirl food dye into shaving cream, roll your eggs, and rinse for stunning marbled designs. A unique and easy Easter craft that kids and adults will love! 🥚🌸
Pin this now to find it later
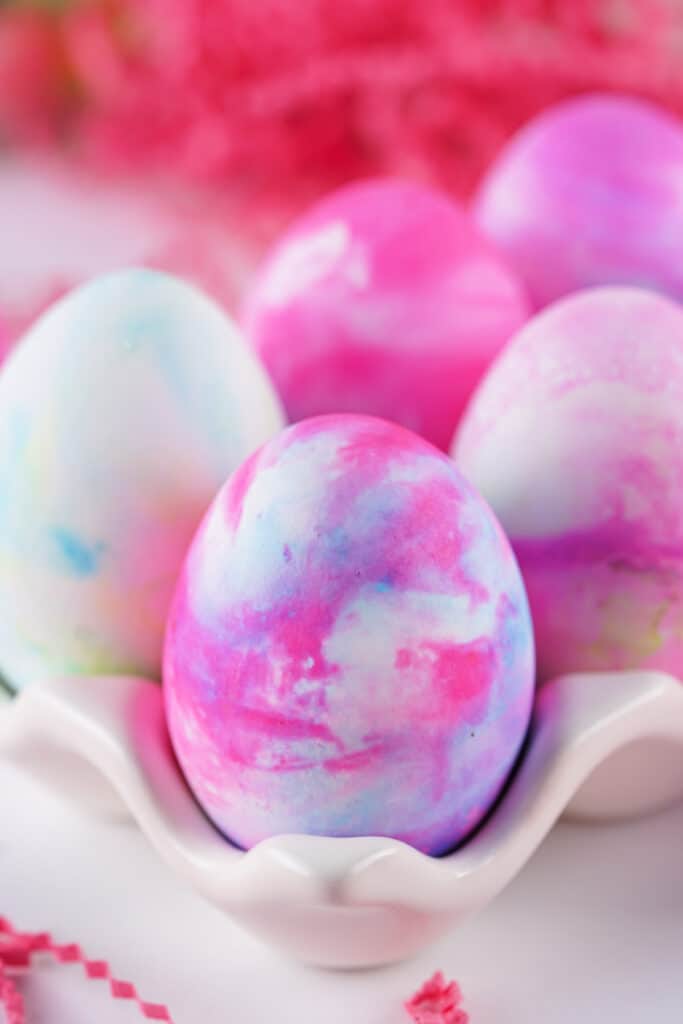
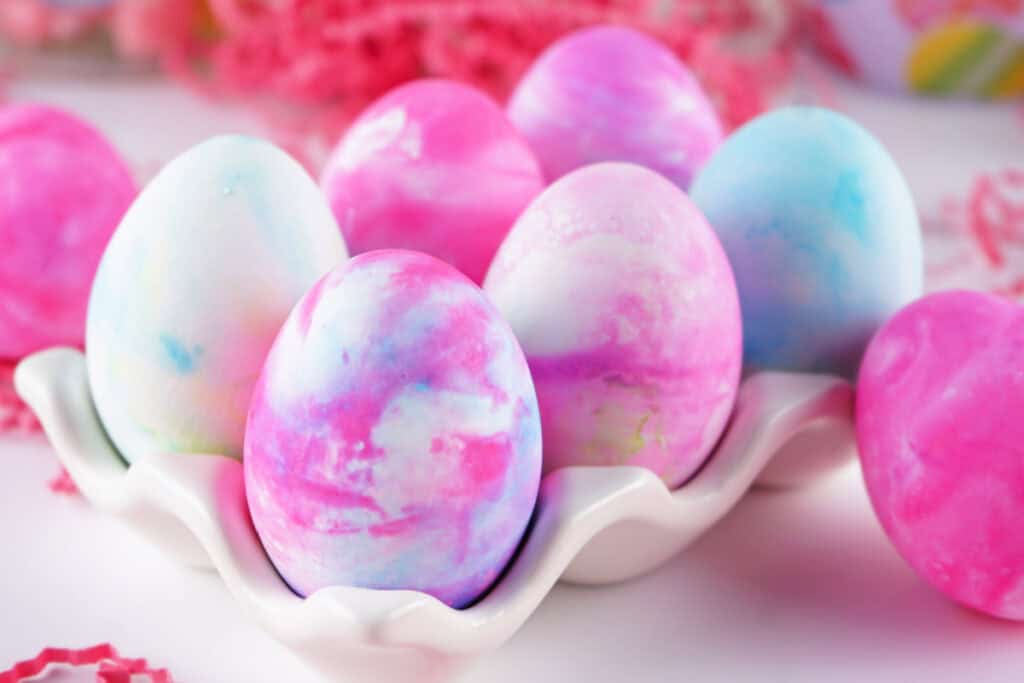
Pin ItShaving Cream Dyed Easter Eggs – A Fun & Mess-Free Easter Craft
Looking for a creative and fun way to dye Easter eggs without using messy cups of liquid dye? Try Shaving Cream Dyed Easter Eggs! This simple method creates beautifully swirled eggs using just shaving cream, food dye, and vinegar. It’s an exciting, hands-on craft perfect for kids and adults alike!
⭐ Why You’ll Love This Recipe
- Easy & Fun – No need for complicated setups or multiple dye cups.
- Vibrant & Unique Designs – Each egg turns out one-of-a-kind with beautiful swirls.
- Kid-Friendly – A safe, hands-on activity that’s great for family bonding.
- Minimal Cleanup – Just rinse and dry—no spills or splashes!
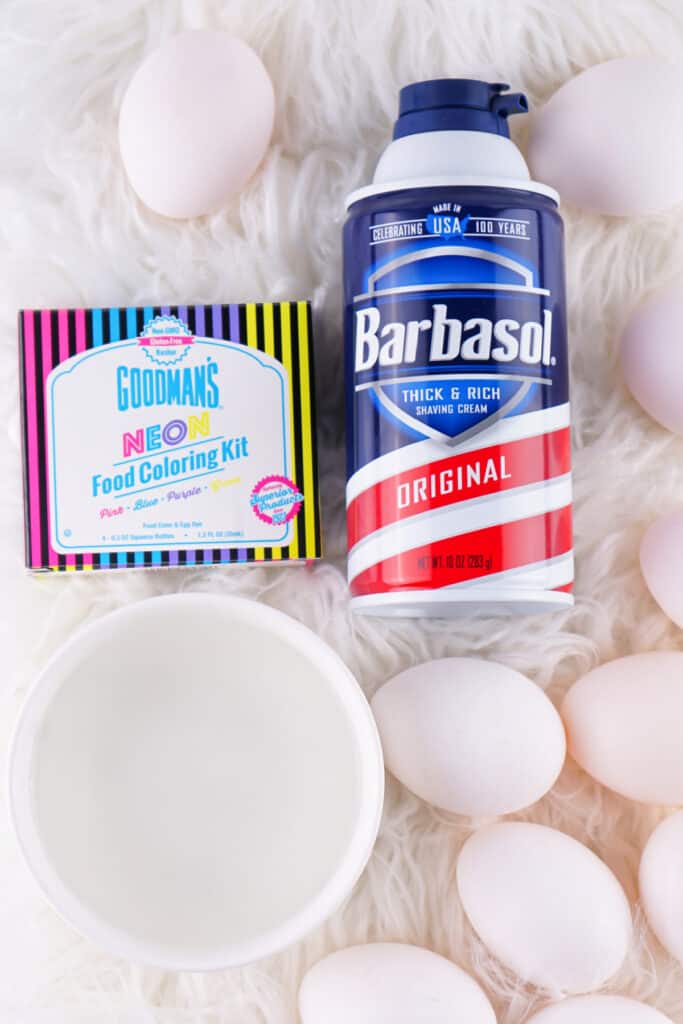
🛒 Ingredients & Substitutions
- hard-boiled eggs – White eggs work best for vibrant colors.
- shaving cream – Swap with whipped cream for an edible version.
- vinegar – Helps colors stick; can be replaced with lemon juice.
- food dye – Liquid works best, but gel dye creates stronger colors.
✨ Variations
- 🎨 Pastel Eggs – Use less dye for a softer look.
- 🌀 Marbled Effect – Swirl colors more for a striking marbled appearance.
- ✨ Glitter Eggs – Add a touch of edible glitter to the shaving cream for sparkle.
🔥 Tips
- Don’t soak eggs too long in vinegar—more than 20 minutes can weaken the shell.
- Use gloves to keep hands dye-free.
- Rinse gently to avoid smudging the designs.
- Avoid eating the eggs unless you use whipped cream instead of shaving cream.
❓ FAQs
Not if you use shaving cream. For edible eggs, use whipped cream instead.
They last as long as regular boiled eggs but are best enjoyed as decorations.
Any tray or shallow dish will work to separate colors.
Yes, but the colors will appear darker and more muted compared to white eggs.
They make beautiful decorations for Easter baskets, centerpieces, or egg hunts.
🍽️ Other Recipes You May Enjoy
Would you like to save this?

Shaving Cream Dyed Easter Eggs
Would you like to save this?
Materials
- paper towels
- rubber gloves
Ingredients
- hard-boiled eggs, as many as desired
- 1 container shaving cream
- white distilled vinegar
- water-based liquid food dye
Instructions
- Prepare Eggs: Soak boiled eggs in vinegar for 10 minutes, then remove, pat dry, and let fully dry.
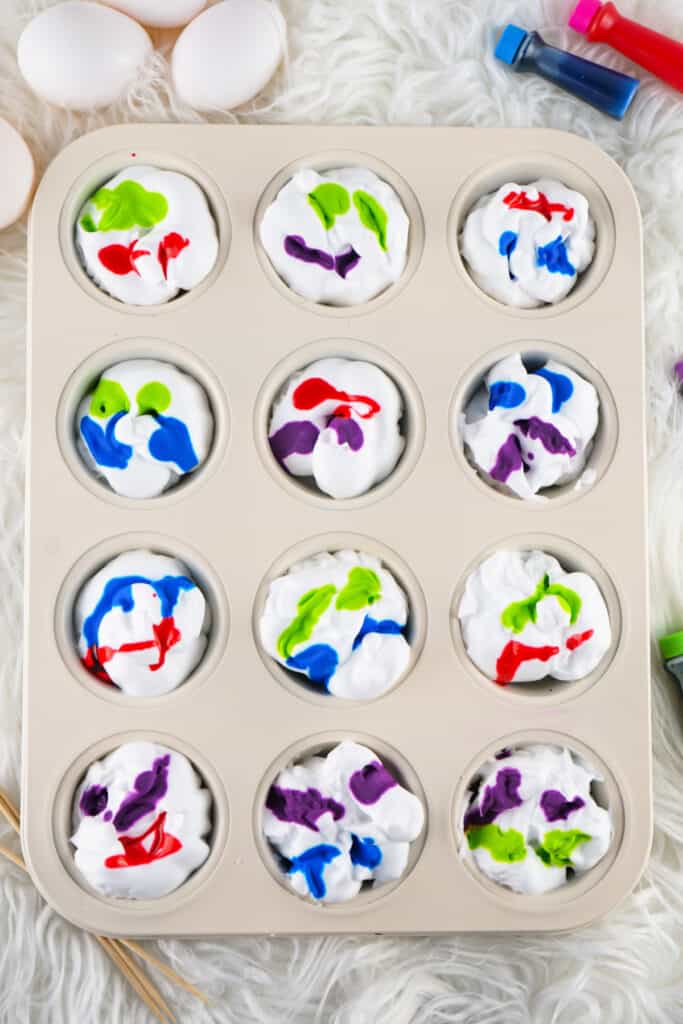
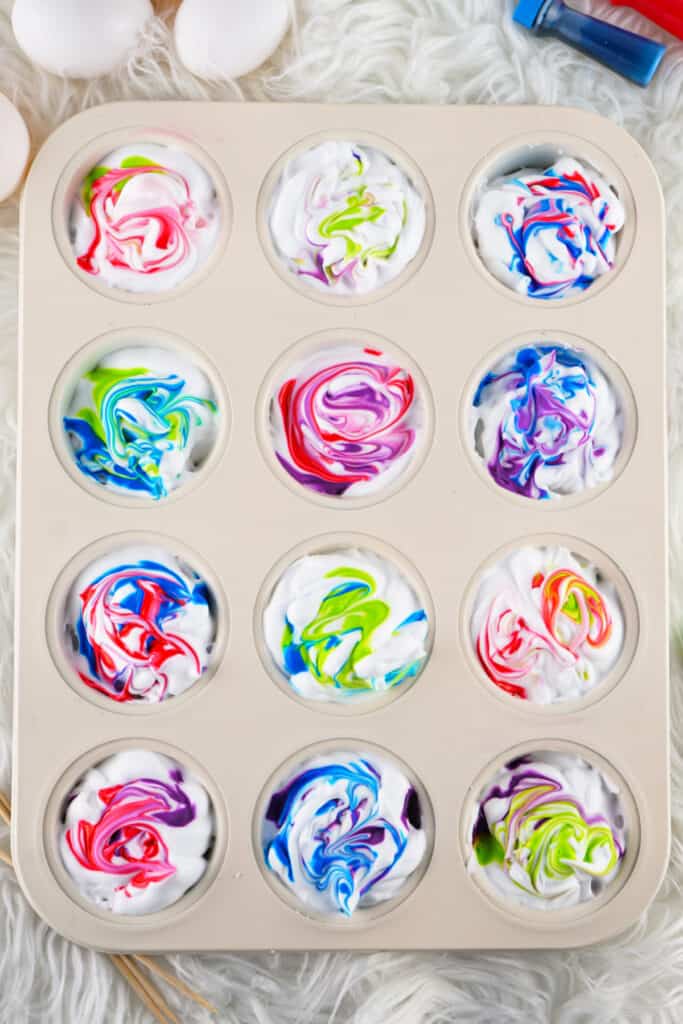
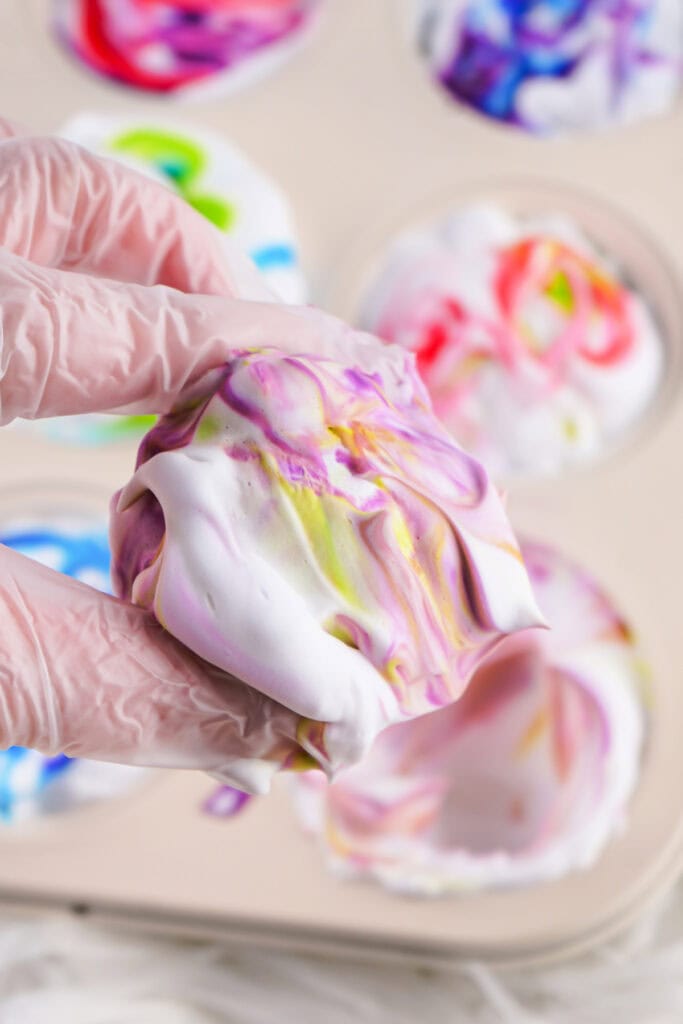
- Set Up Dye: Fill each muffin tin section with shaving cream. Add 2 drops of liquid dye (or 1 drop of gel dye) per section. Swirl with a toothpick.
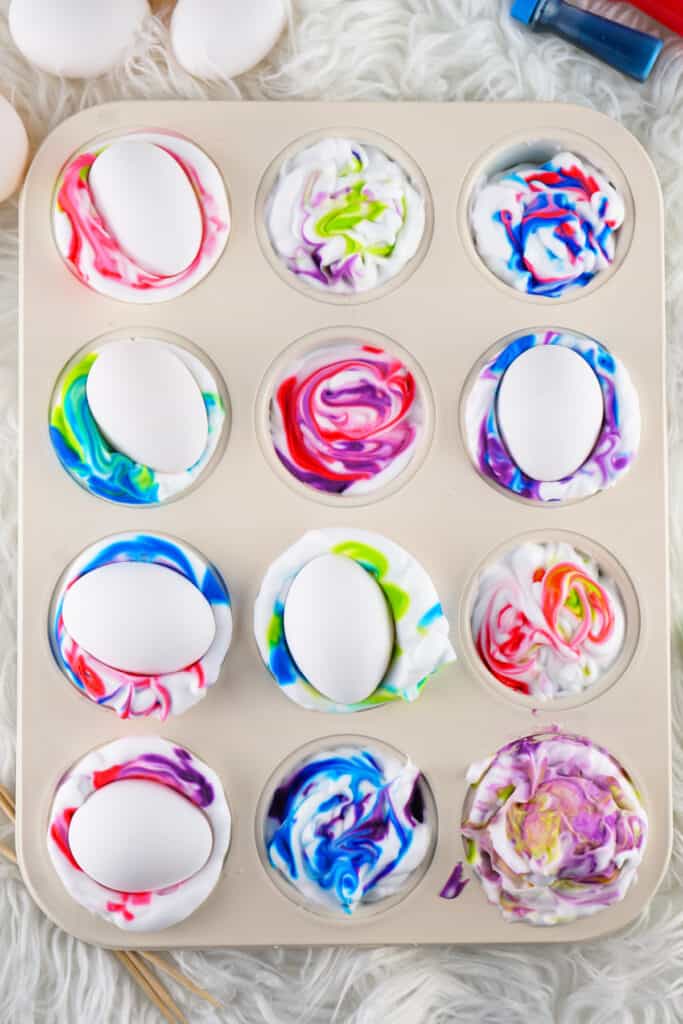
- Dye Eggs: Wearing gloves, roll eggs in the shaving cream until fully covered. Let sit for 10-15 minutes.
- Rinse & Dry: Gently rinse without rubbing and place on paper towels to dry.
Notes
- Do NOT eat dyed eggs.
- Gel dyes are more concentrated than liquid dyes.
- Avoid vinegar soaking for more than 20 minutes to prevent shell erosion.
- Don’t let eggs sit too long in shaving cream to avoid shell damage.
- Any container can be used instead of a muffin tin for color separation.