This post may contain affiliate links. As an amazon associate, I earn from qualifying purchases. See my full Disclosure Policy for details.

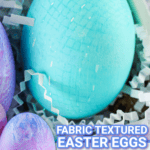
Create beautiful Fabric-Textured Easter Eggs using lace, mesh, or burlap! A fun and easy DIY that adds unique patterns and color to your Easter decor. 🐣✨
Pin this now to find it later
Pin ItHow to Dye Easter Eggs with Fabric
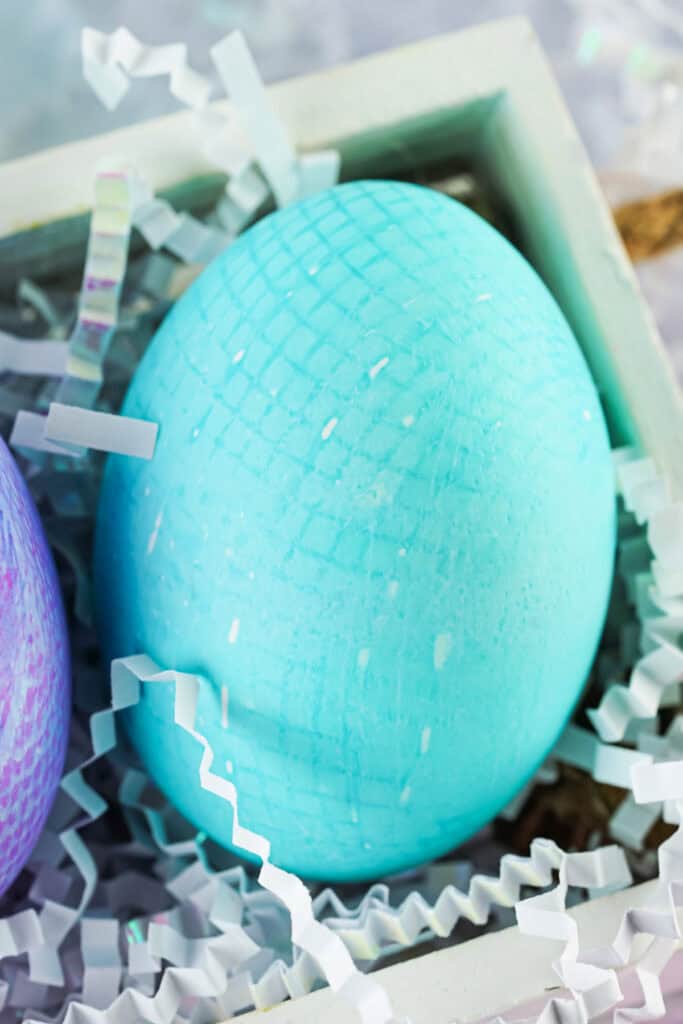
Looking for a fun and creative twist on traditional dyed eggs? These Fabric Textured Easter Eggs are a beautiful, easy DIY project that turns ordinary eggs into eye-catching art. Using materials like lace, mesh, or burlap, you can create intricate patterns and bold colors – no two eggs are the same!
⭐ Why You’ll Love This Recipe
- Super easy with minimal mess
- Uses everyday items like fabric scraps and food coloring
- Kid-friendly (with adult help for scissors)
- Each egg is totally unique!
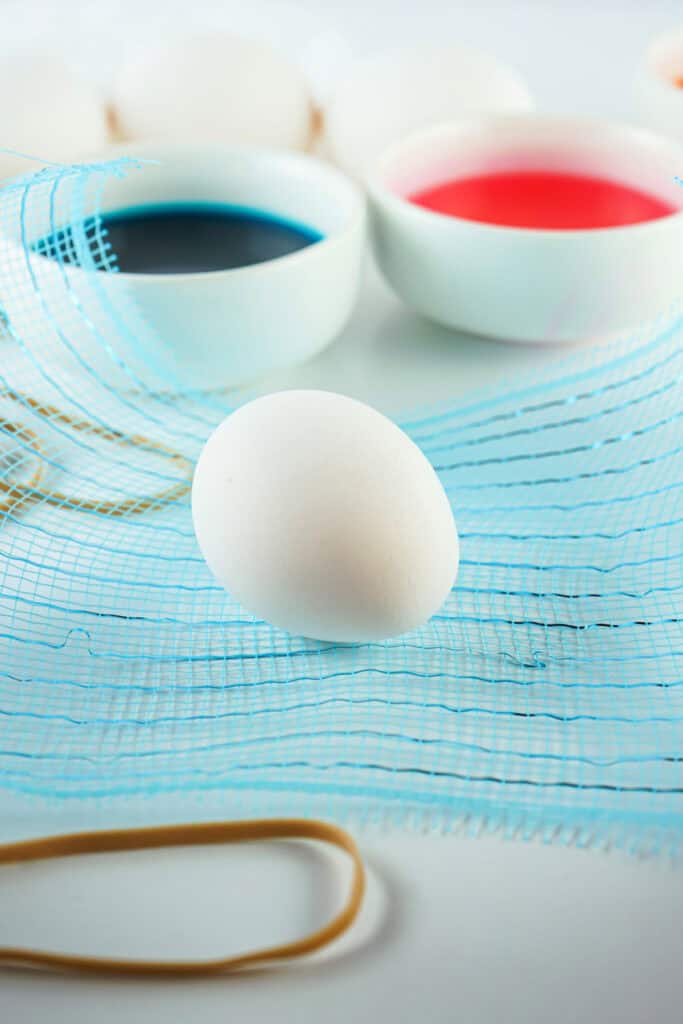
🛒 Ingredients & Substitutions
- pieces of textured fabric (lace, burlap, netting, or poly mesh ribbon) – Any textured fabric with holes works! Try old doilies, mesh produce bags, or cut-up lace curtains.
- hard-boiled eggs – White eggs give the brightest colors, but farm fresh or brown eggs can create moodier, earthy tones.
- egg dye (store-bought or homemade)
- rubber bands
- paper towels
- scissors
✨ Variations
- Use neon or pastel dye for different vibes.
- Try wrapping it with two layers of different textures for a layered look.
- Paint over the finished design with metallic food-safe paint for extra glam.
Would you like to save this?
🔥 Tips & Tricks
- I used a thick lace table runner from Amazon – it worked great! My favorite was a poly mesh ribbon from the dollar store.
- Thin, delicate lace didn’t work as well – the designs came out blurry.
- Due to the egg’s shape, you won’t get full coverage, but adjust the fabric as best you can to keep it tight.
- Strong dyes = short dip times. Some eggs only needed 15 seconds!
- Always test one egg first to find the right timing.
- Pat the egg dry before removing the fabric – this helps keep the pattern crisp.
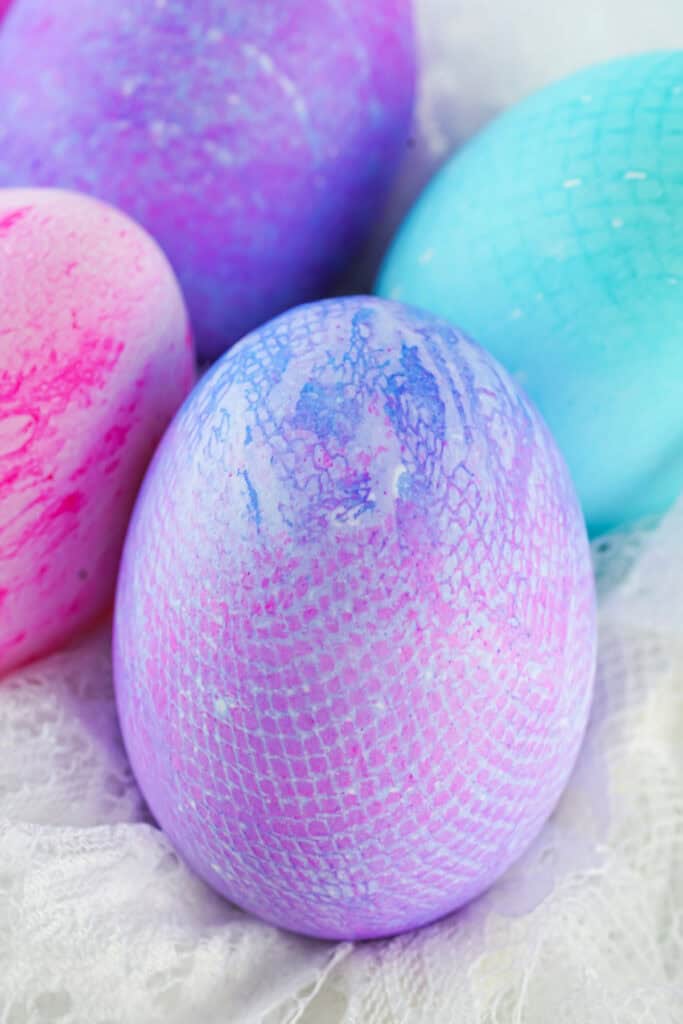
- Bright colors like pink, blue, and purple gave the best results. Orange and yellow didn’t show much.
- This method also works on brown or farm-fresh eggs, but the colors will be darker. Always test one first.
❓ FAQs
Yes – if you use food-safe dye and keep the eggs refrigerated.
Yes! Just keep in mind that the colors will appear darker. Test one first.
Try a thicker or more open-textured fabric, and make sure it’s wrapped tightly.
Yes! As long as it hasn’t torn or become overly dyed, just rinse it out, dry it, and reuse for more eggs.
Technically, yes, but boiled eggs are safer for handling and displaying. If you want to keep the eggs long-term, use hollowed-out eggs instead.
Boiled eggs last about a week in the fridge. If you’re using them for décor only, you can hollow out the eggs before dyeing.
This usually happens when the fabric isn’t tight enough or the egg stays in the dye too long. Try reducing the dip time and securing the fabric more snugly.
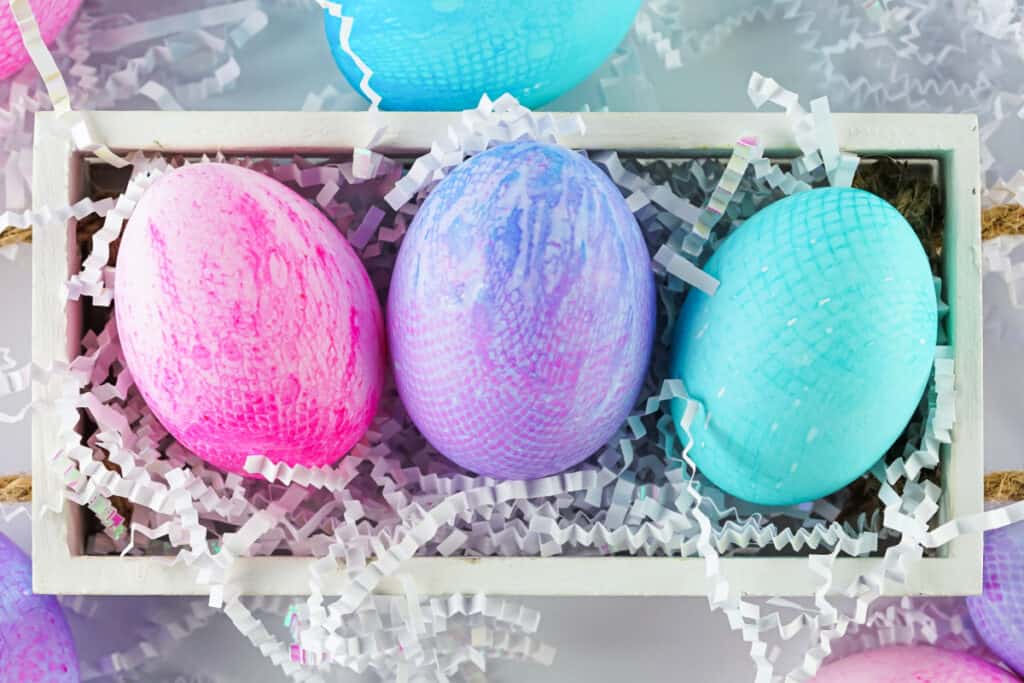
Place them in a basket with paper grass, use egg stands, add them to a spring wreath, or line them up along a mantel or windowsill.
These DIY Easter Eggs are a beautiful way to celebrate spring and Easter. They also make great centerpieces, basket fillers, or even thoughtful handmade gifts. Happy crafting!
🍽️ Other Recipes You May Enjoy

Fabric-Textured Easter Eggs
Would you like to save this?
Materials
- 6×10-inch pieces of textured fabric (lace, burlap, netting, or poly mesh ribbon)
- rubber bands
- paper towels
- scissors
Ingredients
- hard-boiled eggs
- egg dye, store-bought or homemade
Instructions
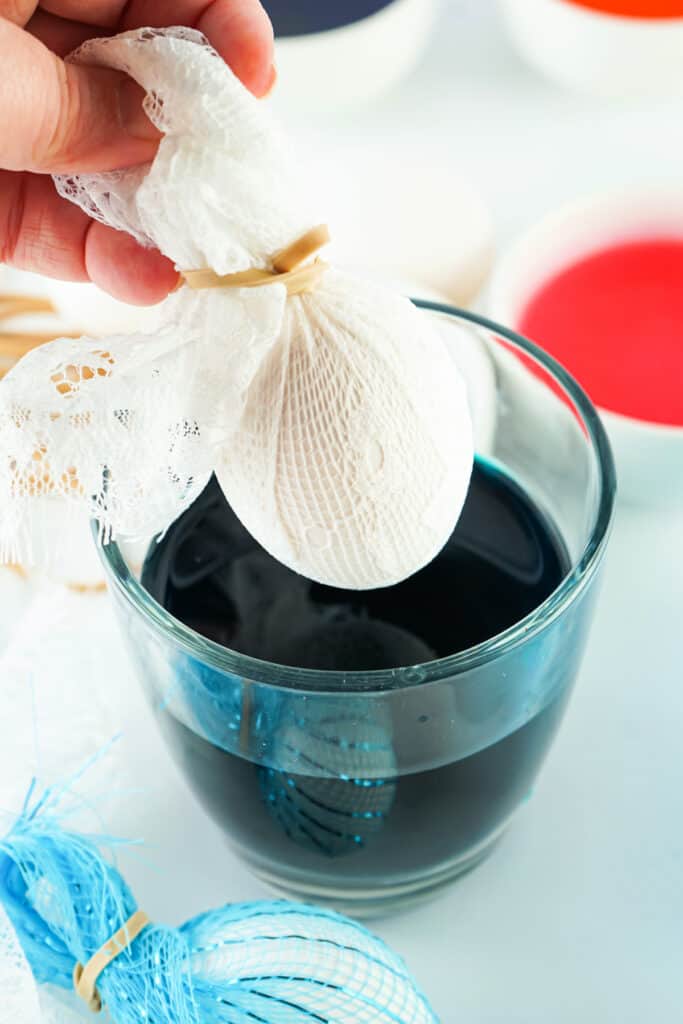
- Prepare the Dye. Mix your egg dye according to the instructions. I used food coloring, which can be very strong, so a little goes a long way.
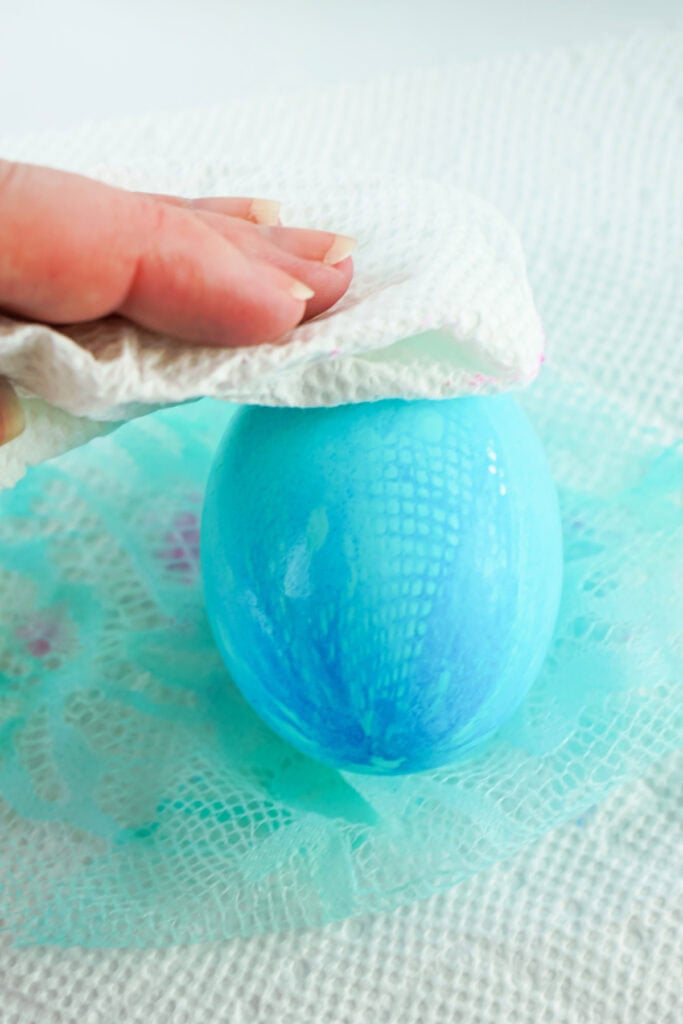
- Wrap the Egg. Tightly wrap a piece of fabric around your egg. Secure it at the top with a rubber band. Make sure the fabric is pressed snugly against the shell – it helps create a clearer design.
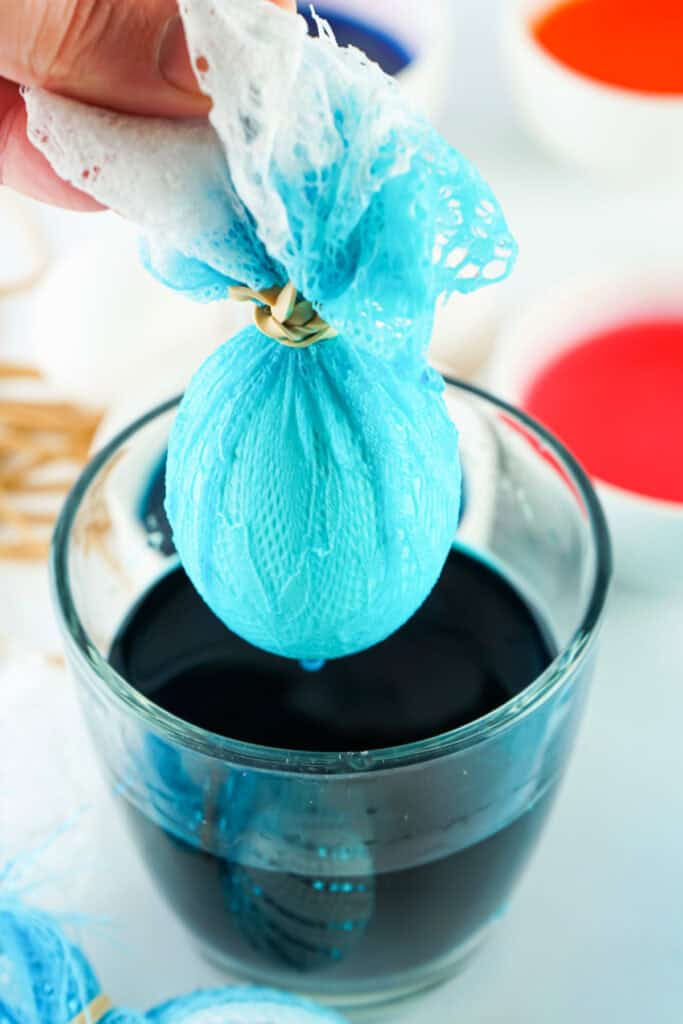
- Dye the Egg. Dip the wrapped egg fully into the dye. Leave it for about 30 seconds – or even less if the dye is strong. The longer it sits, the deeper the color and the more it may blur the design.
- Dry the Egg. Remove the egg and gently pat it dry with a paper towel. Let it sit for about 2 minutes.
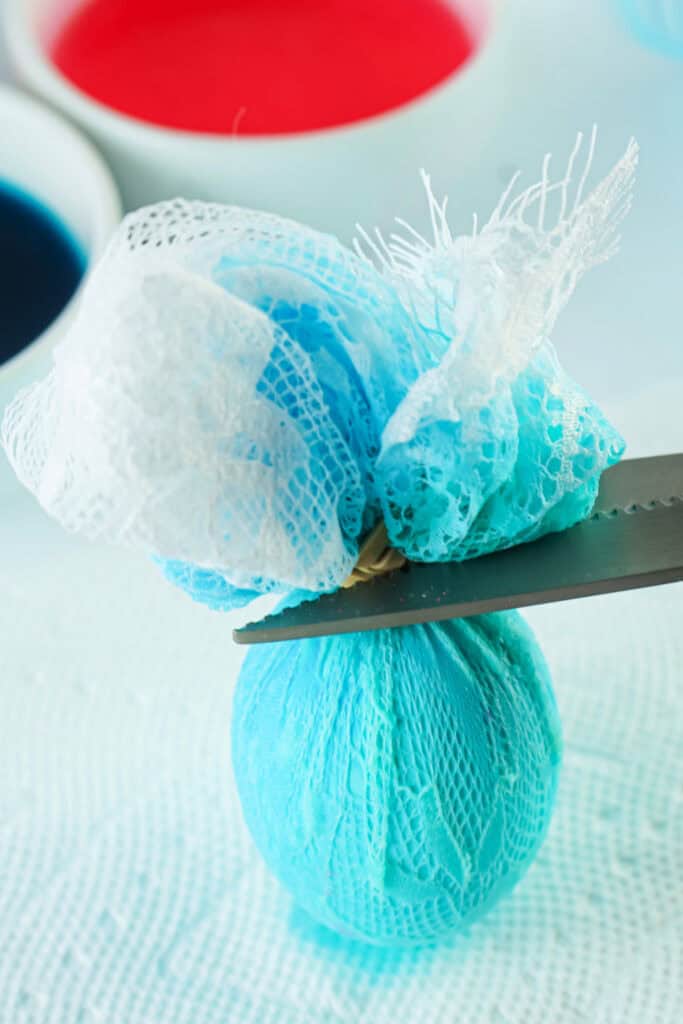
- Unwrap. Carefully cut away the fabric wrap.
- Final Dry. Pat dry again and let the egg rest for 3 more minutes.
- Repeat and Enjoy! Keep going with as many eggs as you like.
Notes
- Hard-boiled eggs last about a week in the fridge.
Tips for Success
- The tighter the fabric, the clearer the pattern.
- Don’t leave the egg in the dye too long – 30 seconds or less is ideal.
- Always pat dry before removing the fabric to preserve the design.
- Test one egg first to figure out the best dye time.