This post may contain affiliate links. As an amazon associate, I earn from qualifying purchases. See my full Disclosure Policy for details.

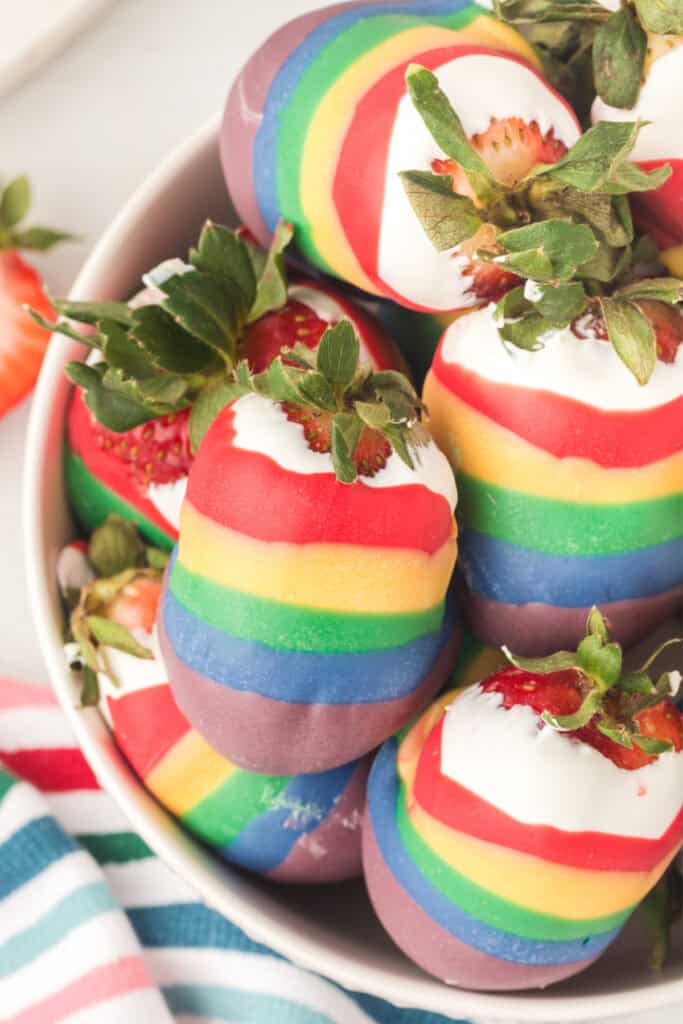
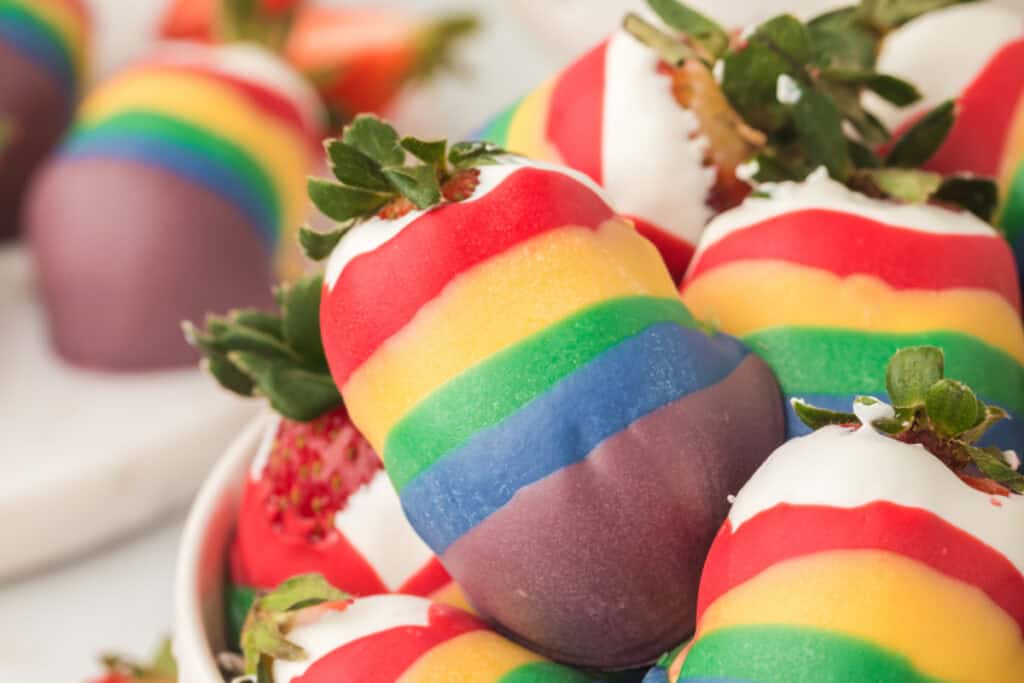
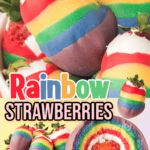
Make a statement with these Rainbow Candy Coated Strawberries! 🍓✨ Juicy berries coated in vibrant layers of candy for a fun & colorful treat. Perfect for parties, birthdays, or just because! 🌈💖
Pin this now to find it later
Pin ItRainbow Foods
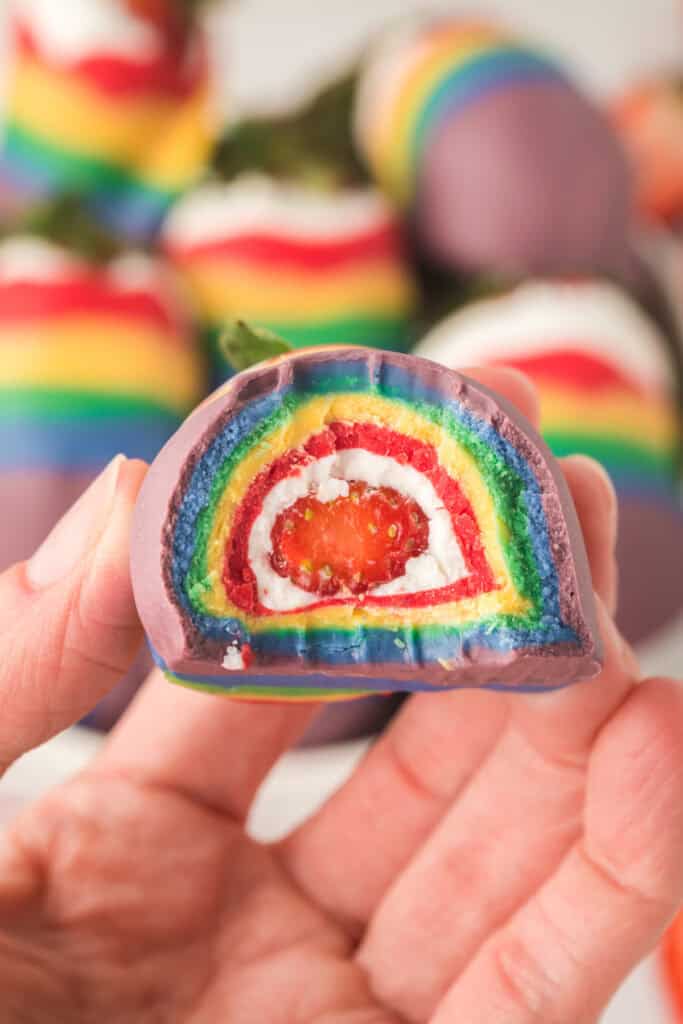
Looking for a vibrant, eye-catching dessert? This Rainbow Candy Coated Strawberries recipe is perfect for parties, birthdays, or just a fun treat! With layers of colorful candy coating, each bite bursts with sweetness and a pop of color.
These easy-to-make, no-bake treats are a hit at any gathering. Try them out and wow your guests with this sweet & colorful rainbow foods idea that is quite a delight!
⭐ Why You’ll Love This Recipe
- Easy & Fun to Make – Simple dipping steps create a beautiful rainbow effect.
- No Baking Required – Just melt, dip, and let them set!
- Perfect for Any Occasion – Great for parties, birthdays, or a festive snack.
- Customizable – Swap out colors or add sprinkles for extra flair!
🛒 Ingredients & Substitutions
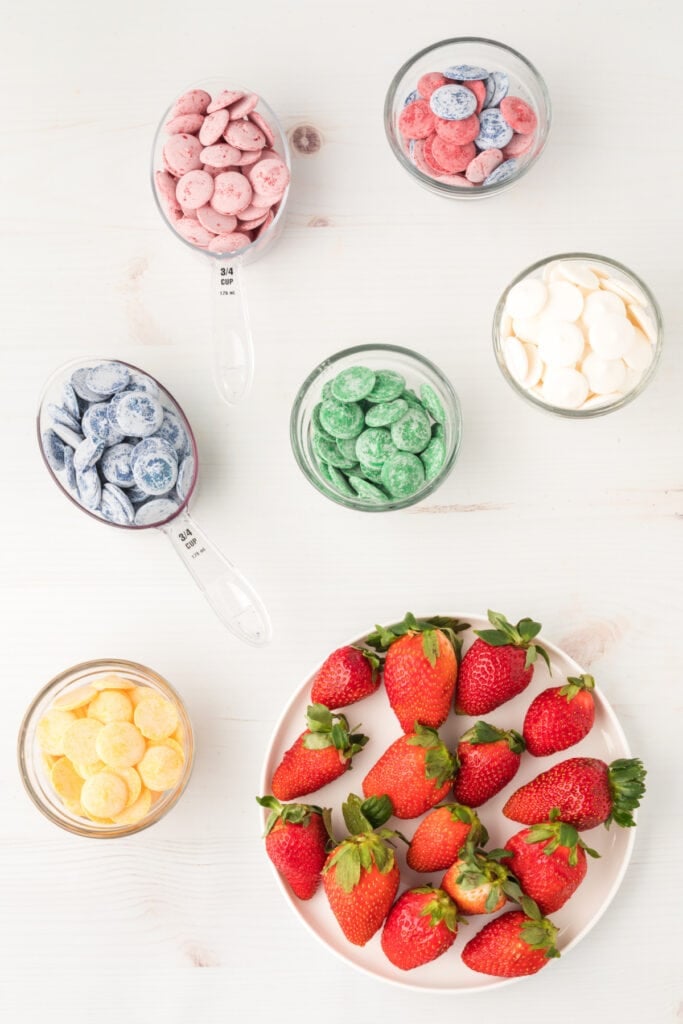
- candy wafers – For this Candy Coated Strawberries recipe, I used white, red, yellow, green, blue, and purple.
- 12 large whole strawberries
Substitutions
- Chocolate Alternative: Use white chocolate with oil-based food coloring instead of candy melts.
- Dairy-Free: Opt for dairy-free candy melts or vegan white chocolate.
- Sugar-Free: Use sugar-free chocolate for a lower-sugar option.
- Color Variations: Skip the full rainbow and go for a pastel ombré or themed colors.
- Extra Toppings: Add sprinkles, edible glitter, or crushed nuts for extra texture!
🔥 Tips For Success
- Use Dry Strawberries – Water can prevent the candy from sticking properly.
- Melt Candy in Small Batches – This prevents it from hardening too quickly.
- Hold by the Stem or Use a Toothpick – Makes dipping easier and less messy.
- Let Each Layer Set Completely – This keeps the colors clean and defined.
- Work Quickly – Melted candy cools fast, so dip efficiently.
❓ FAQs
Yes! They’re best made the same day, but you can prepare them up to 24 hours in advance and store them in the fridge.
Let each layer set at room temperature before refrigerating. Rapid temperature changes can cause cracking.
Absolutely! Use white chocolate with oil-based food coloring to create the rainbow effect. Avoid water-based food dyes, as they can cause the chocolate to seize.
Place a paper towel under them in an airtight container to absorb moisture.
No. Freezing will cause the strawberries to become mushy and the candy coating to crack when thawed.
Add a teaspoon of vegetable shortening or coconut oil to thin it out for a smoother dip.
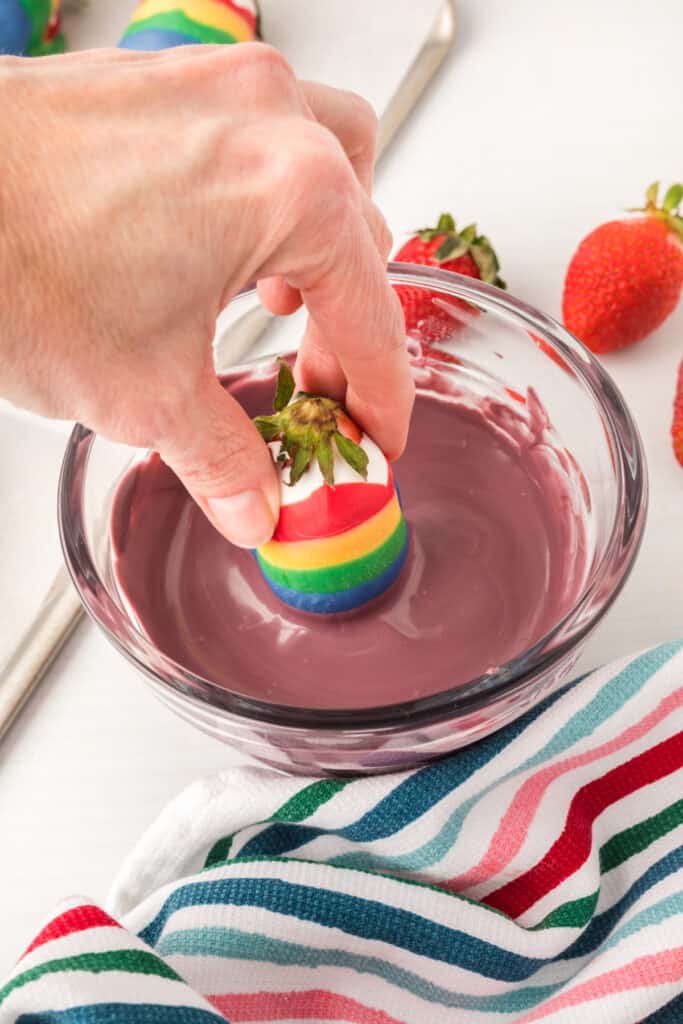
Hold the strawberry by the stem and dip at a slight angle, twisting gently as you lift for a clean transition between colors.
No. Frozen strawberries release too much moisture when thawed, preventing the candy from sticking properly.
Store them in the fridge in a single layer for up to 48 hours, but they’re best enjoyed fresh!
🍽️ Other Recipes You May Enjoy
Would you like to save this?
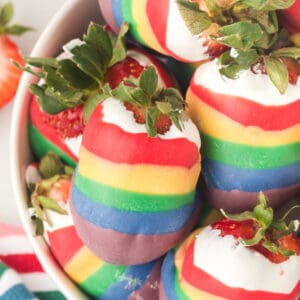
Rainbow Candy Coated Strawberries
Would you like to save this?
Equipment
- spoon
Ingredients
- 1 cup white Make ‘n Mold Candy Wafers
- 1 cup red Make ‘n Mold Candy Wafers
- ¾ cup yellow Make ‘n Mold Candy Wafers
- ¾ cup green Make ‘n Mold Candy Wafers
- ¾ cup blue Make ‘n Mold Candy Wafers
- ¾ cup purple Make ‘n Mold Candy Wafers
- 12 large whole strawberries, washed and dried
Instructions
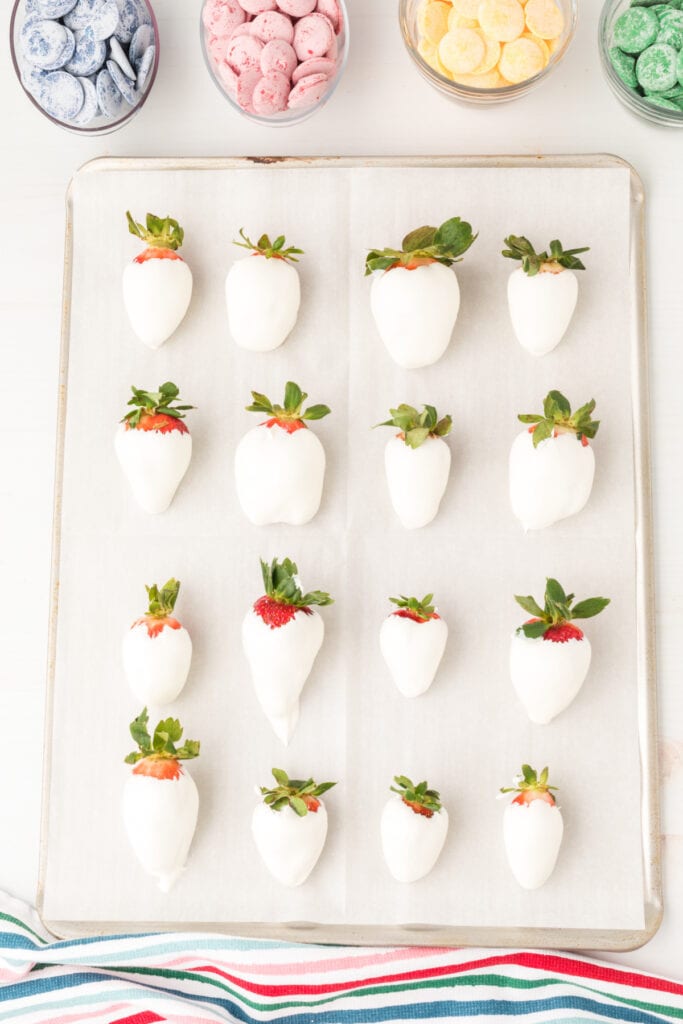
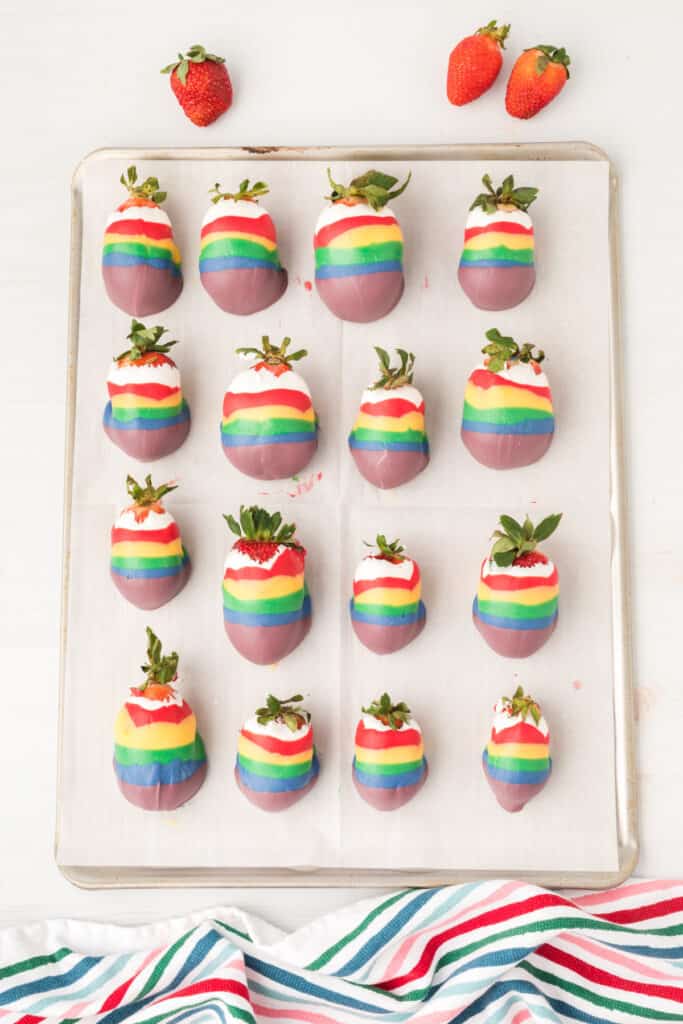
- Line a baking sheet with parchment paper.
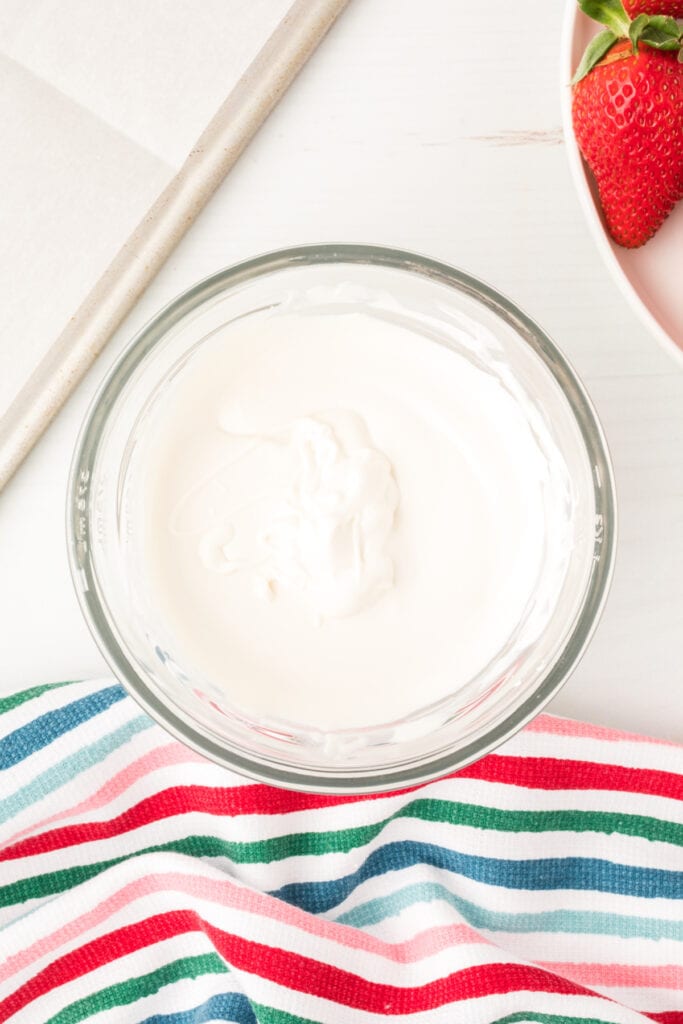
- Melt white candy wafers per package instructions. Dip each strawberry, twist slightly, let excess drip off, and place on parchment. Let set for 10 minutes.
- Melt red wafers and dip strawberries, covering 90% of the white. Let set for 10 minutes or until the candy coating has set.
- Melt yellow wafers and dip, covering 75% of the red. Let set for 10 minutes or until the candy coating has set.
- Melt green wafers and dip, covering 75% of the yellow. Let set for 10 minutes or until the candy coating has set.
- Melt blue wafers and dip, covering 75% of the green. Let set for 10 minutes or until the candy coating has set.
- Melt purple wafers and dip, covering 75% of the blue. Let set for 30 minutes or until the candy coating has set.
Notes
Storage & Shelf Life of Rainbow Candy-Coated Strawberries
🍓 Storage Tips:- Refrigeration: Store in a single layer on a parchment-lined plate or airtight container in the fridge.
- Avoid Moisture: Place a paper towel under the strawberries to absorb excess moisture and prevent sweating.
- No Stacking: To keep the candy coating intact, avoid stacking the strawberries.
- Best Enjoyed Fresh: Within 24 hours for the best texture and flavor.
- Refrigerated: Up to 48 hours, though condensation may affect the candy coating.
- Not Freezer-Friendly: Freezing causes the chocolate to crack and the strawberries to become mushy when thawed.
Nutrition
Nutrition information is automatically calculated, so should only be used as an approximation.
Originally published on March 13, 2015. Updated on March 6, 2025.


LOVE these! How cool!
These are absolutely adorable!
These are absolutely adorable!
Wow! So cute 🙂
Love these Strawberries!! I had to click when I seen them in my feed 🙂 I also pinned and shared
Thanks girl for letting me guest post. xo San
OMgoodness – these are amazing!! Pinned and shared!