This post may contain affiliate links. As an amazon associate, I earn from qualifying purchases. See my full Disclosure Policy for details.

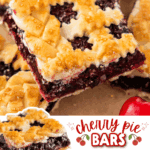
🍒 These Cherry Pie Bars are the easiest way to enjoy all the flavor of cherry pie without the fuss! Perfect for parties, potlucks, or snacking!
Pin this now to find it later
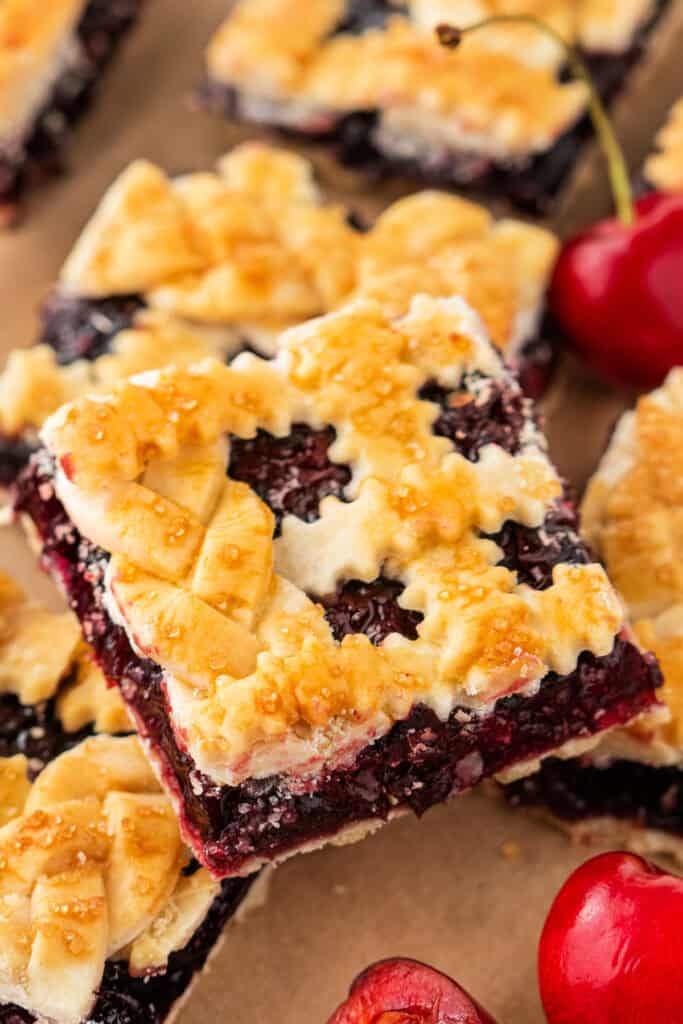
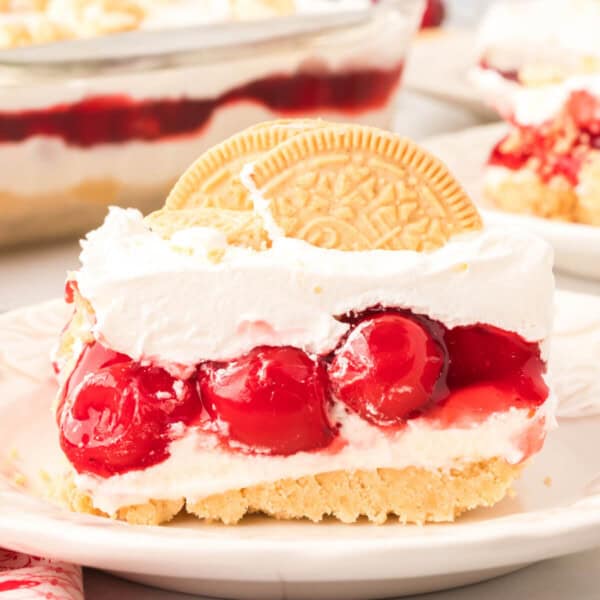
Pin ItCherry Bars
If you’re craving cherry pie without all the work, these Cherry Pie Bars are your answer. This recipe for Cherry Pie Bars is simple, sweet, and totally satisfying. With a golden crust, gooey cherry filling, and a crisp lattice topping, they’re everything you love about cherry pie desserts in an easy, sliceable form.
Whether you’re baking for a summer picnic, potluck, or just want a quick treat, this easy Cherry Pie Bars recipe is a total win. Made with store-bought crusts and frozen cherries, these cherry bars are fuss-free and full of flavor. You’ll want to keep this cherry bars recipe handy year-round!
⭐ Why You’ll Love This Recipe
- No need to make homemade crust
- A fun twist on classic cherry pie desserts
- Simple ingredients and minimal prep
- Perfect for sharing or freezing for later
- A go-to cherry bars recipe for any occasion
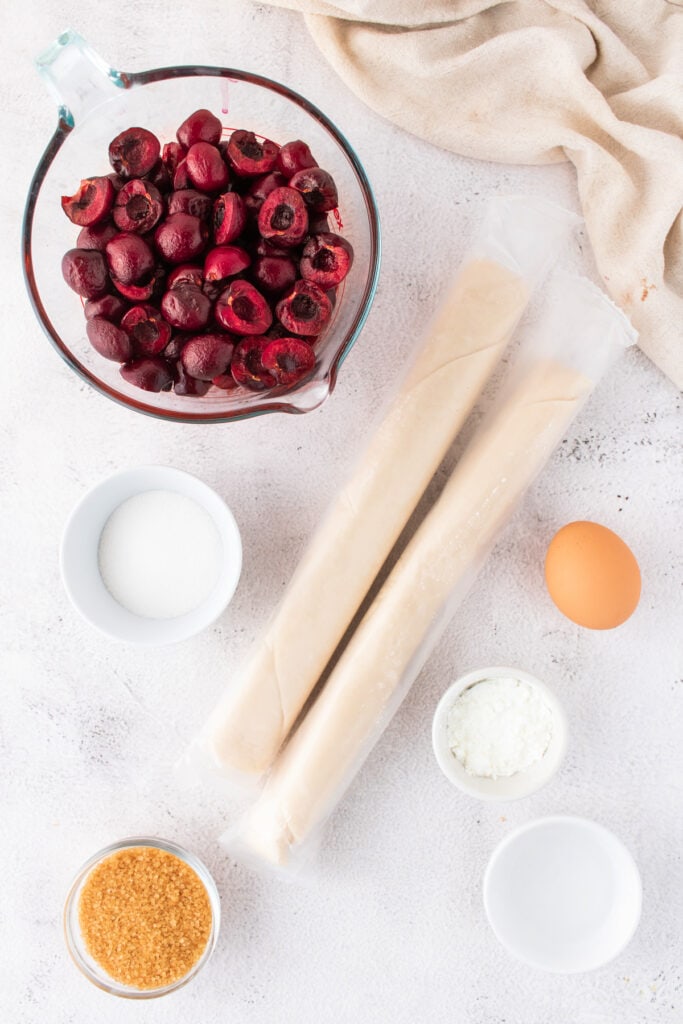
🛒 Ingredients & Substitutions
- cherries – use frozen sweet red cherries or substitute fresh or canned pie filling
- granulated sugar
- cornstarch – arrowroot or tapioca starch works too
- egg – for egg wash; use milk or cream as a substitute
- turbinado sugar – swap with granulated or sanding sugar
- refrigerated pie crust – homemade crust or puff pastry both work
✨ Variations
- Add a splash of almond extract to the filling for a bakery-style twist
- Use puff pastry for a flakier texture
- Drizzle with vanilla or almond glaze after baking
- Mix in blueberries or raspberries for a berry medley
Would you like to save this?

🔥 Tips
- Cool the cherry filling before assembling the bars
- Freeze the lattice before transferring so it holds its shape
- Let bars cool completely for clean cuts
- Use parchment for easy removal from the pan
❓ FAQs
Yes! Just be sure to pit them and adjust the sugar slightly depending on how sweet your cherries are.
Yes, just reduce the added sugar since most canned fillings are already sweetened.
Nope! Straight strips work just fine, but braids add a decorative touch if you’re feeling fancy.
Yes – bake in a 9×13-inch pan and adjust bake time as needed.
No need. They’ll break down as they cook, so allow a few extra minutes to thicken the filling fully.
Yes! These bars taste even better the next day once the flavors have settled. Just store them covered.
That’s up to you! You can make nine large bars or cut into 12-16 smaller squares for parties or trays.
Turbinado sugar is a coarse, raw sugar that gives a nice crunch and sparkle. You can use granulated sugar or skip it if needed.
Yes! A simple powdered sugar glaze with a splash of milk or almond extract is delicious drizzled over cooled bars.
Make sure your cherry filling is fully thickened and cooled before adding it to the crust. That helps prevent sogginess.
🍽️ Other Recipes You May Enjoy


Cherry Pie Bars
Would you like to save this?
Equipment
- 8×8 inch baking dish
- medium saucepan
- pastry wheel or sharp knife
- small bowl (for egg wash)
Ingredients
- 2-½ cups sweet red cherries, frozen
- 2 tablespoons granulated sugar
- 1 tablespoon cornstarch
- 1 tablespoon water
- 1 large egg
- turbinado sugar, for topping
- 1 box refrigerated pie crusts, (14.1 ounces, 2 sheets)
Instructions
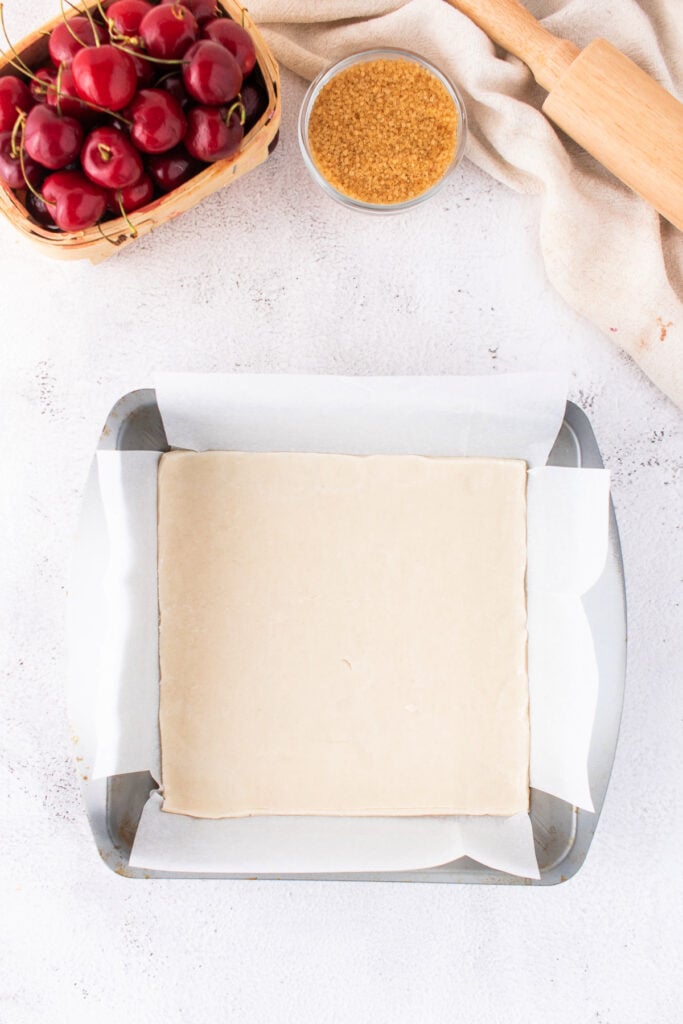
- Preheat the oven to 375°F. Line an 8×8 inch baking dish with parchment paper.
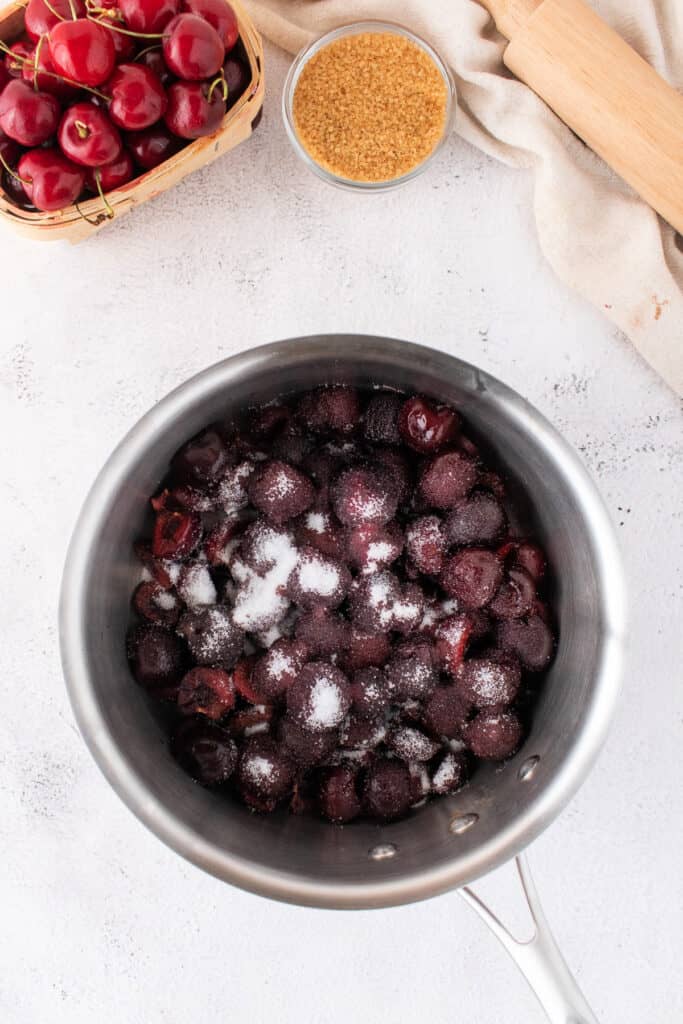
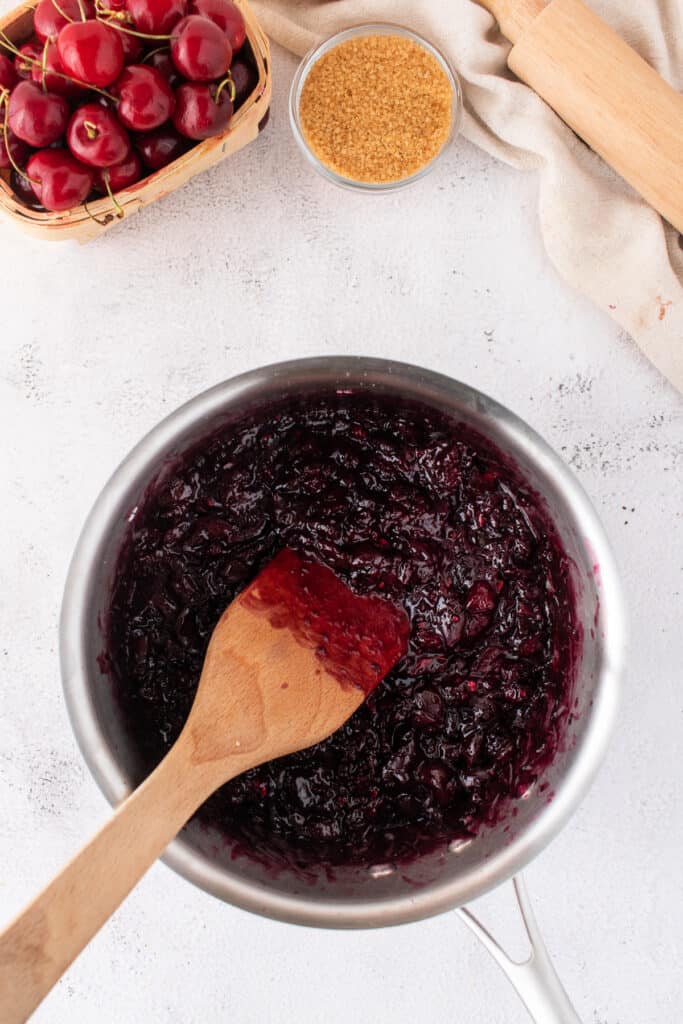
- In a medium saucepan over medium heat, combine the cherries and sugar. Cook for 15-20 minutes, stirring and mashing occasionally, until bubbly and slightly thickened.
- Stir in the cornstarch and continue cooking until the mixture thickens. Remove from heat and let cool.
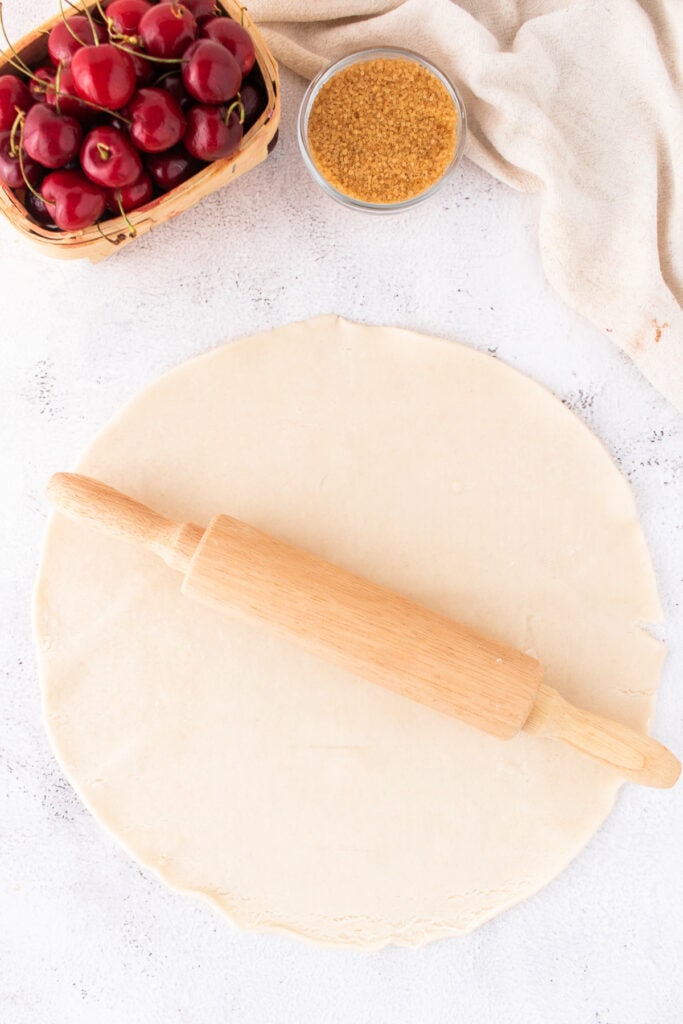
- Roll out one pie crust and press it evenly into the bottom of the prepared baking dish. Bake for 15-20 minutes or until the edges are golden.
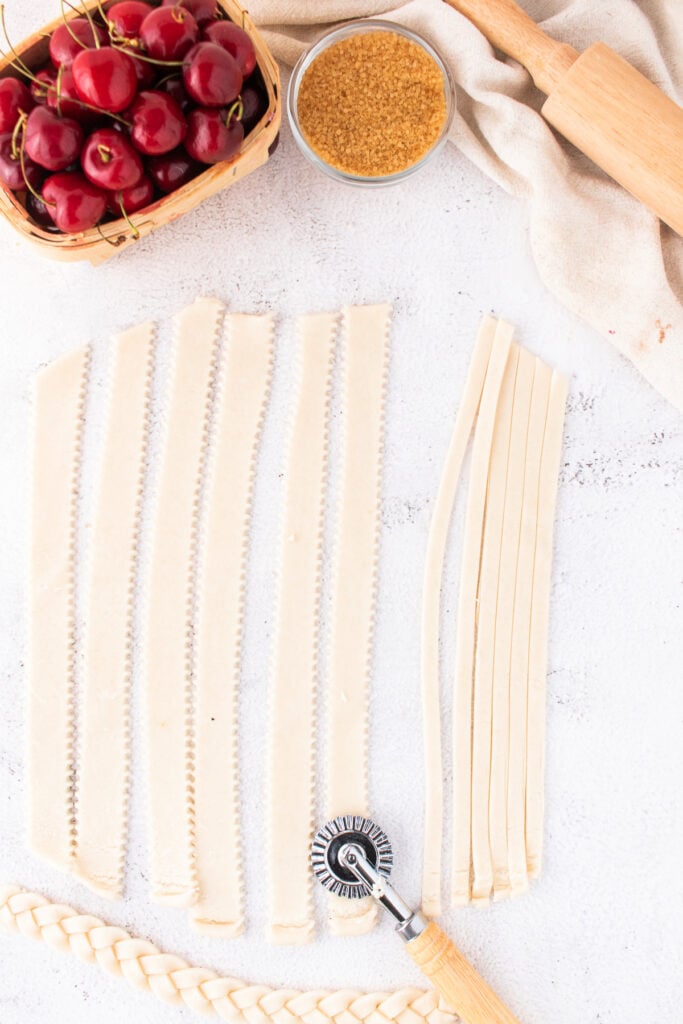
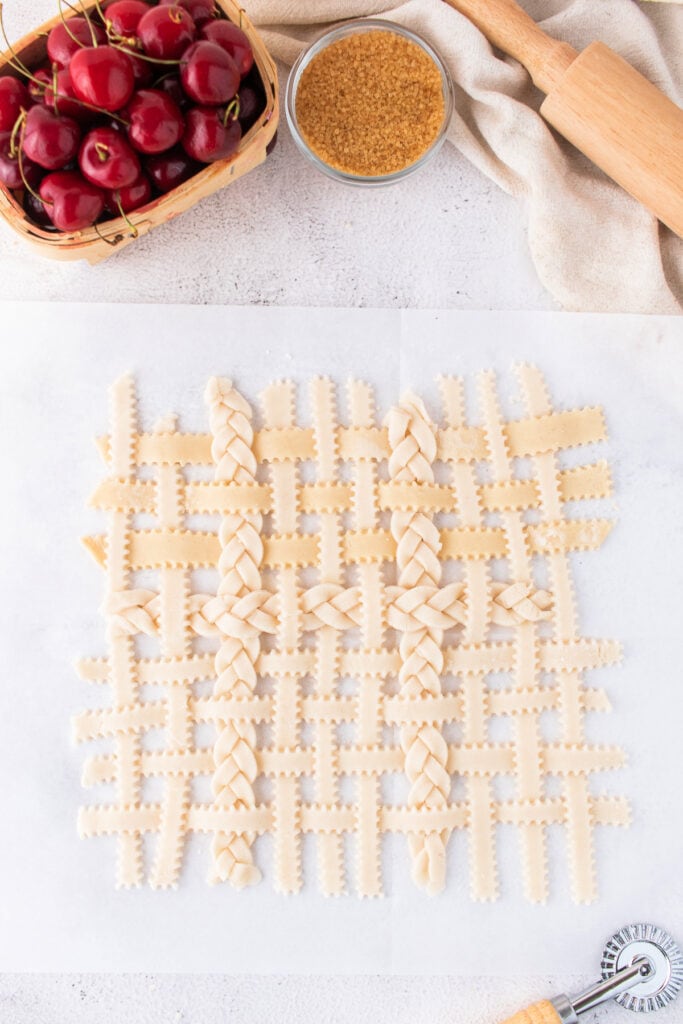
- While the bottom crust bakes, roll out the second pie crust into a 9×9 inch square. Cut into ½ inch strips using a pastry wheel. Weave a lattice on a parchment sheet, adding braids if desired. Freeze until firm.
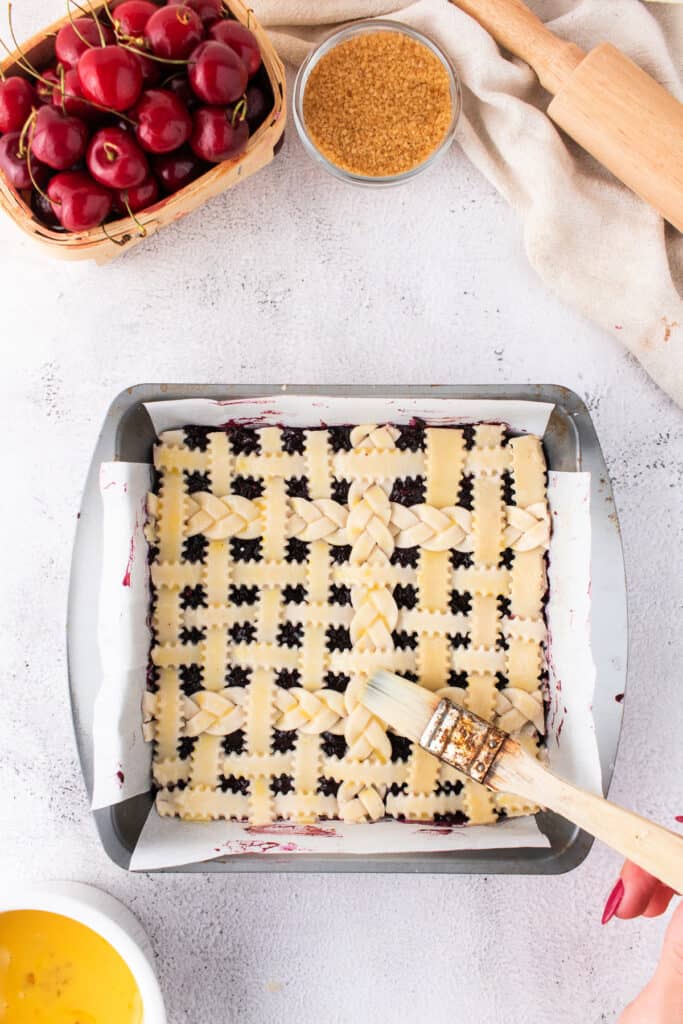
- Spread the cooled cherry filling evenly over the baked crust. Carefully place the frozen lattice on top.
- Beat the egg with the water and brush it over the lattice. Sprinkle with turbinado sugar.
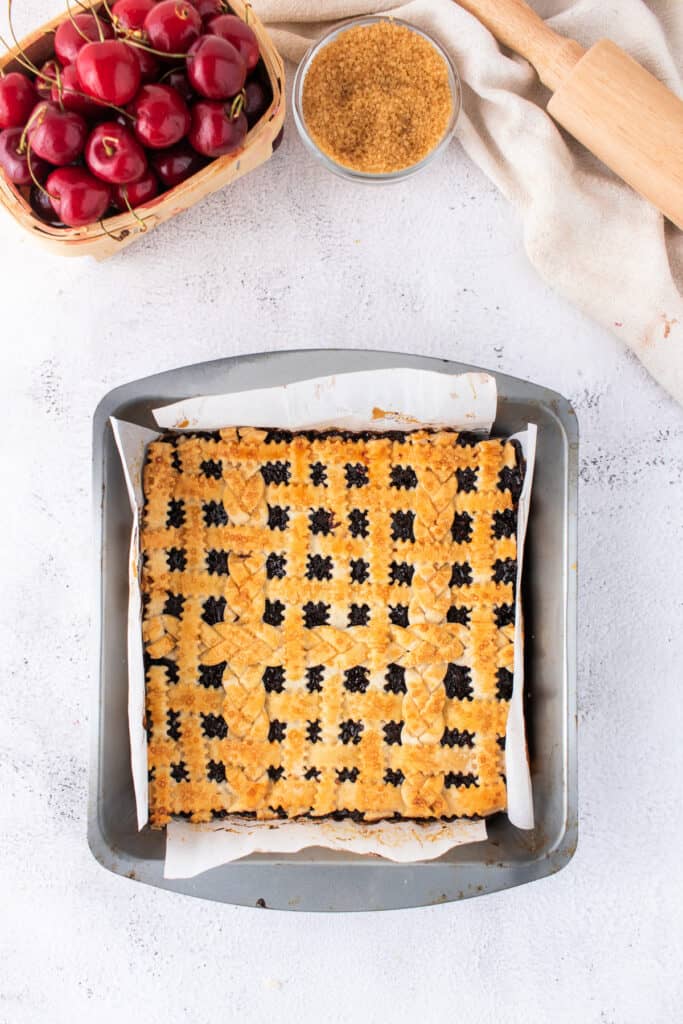
- Bake for 25-30 minutes or until the top is golden brown. Let cool completely before slicing into bars.
Notes
🥡 STORAGE
- Store leftovers in an airtight container at room temperature for up to 2 days.
- For longer storage, refrigerate for up to 5 days.
♨️ REHEATING
- Microwave: Heat individual bars for 10-15 seconds.
- Oven: Warm at 300°F for 5-8 minutes until just heated through.
❄️ FREEZING
- Freeze fully cooled bars in a single layer. Once frozen, transfer to a zip-top freezer bag. Freeze up to 2 months.
- Thaw overnight in the fridge before serving.
💡 TIPS FOR BEST RESULTS
- Use a pastry cutter or sharp knife for clean lattice strips.
- Don’t skip freezing the lattice – it helps keep the shape when transferred.
- Let the cherry filling cool before assembling to avoid a soggy crust.
🍳 ALTERNATE COOKING METHODS
- Air fryer: Bake individual squares at 325°F for 6-8 minutes to reheat or crisp the top.
- Toaster oven: Great for reheating one or two bars at a time.
♻️ LEFTOVERS
- Serve leftover bars warmed with vanilla ice cream.
- Crumble into a yogurt parfait or blend into a milkshake for a cherry pie twist.
Nutrition
Nutrition information is automatically calculated, so should only be used as an approximation.