This post may contain affiliate links. As an amazon associate, I earn from qualifying purchases. See my full Disclosure Policy for details.

These Spring Rice Krispies Treats Pops are a fun and easy no-bake treat! Topped with marshmallows, candy melts, sprinkles, and M&M’s – perfect for Easter, spring parties, or gifting. Kids and adults will love them!

Pin this now to find it later
Pin ItSpring Rice Krispies Treats Pops – a fun snack for Spring!
Looking for fun and festive Easter treats or spring treats that come together in no time? These Rice Krispies Treats Pops are colorful, kid-friendly, and super easy to make using store-bought treats, peanut butter, and candy. If you love quick Rice Krispies Treats recipes, this one’s a must-try!
⭐ Why You’ll Love This Recipe
- No baking required – a perfect last-minute spring dessert
- Fun to decorate – great for kids and parties
- Customizable – switch up colors and toppings easily
- Sweet & salty combo – thanks to the Rice Krispies Treats peanut butter base
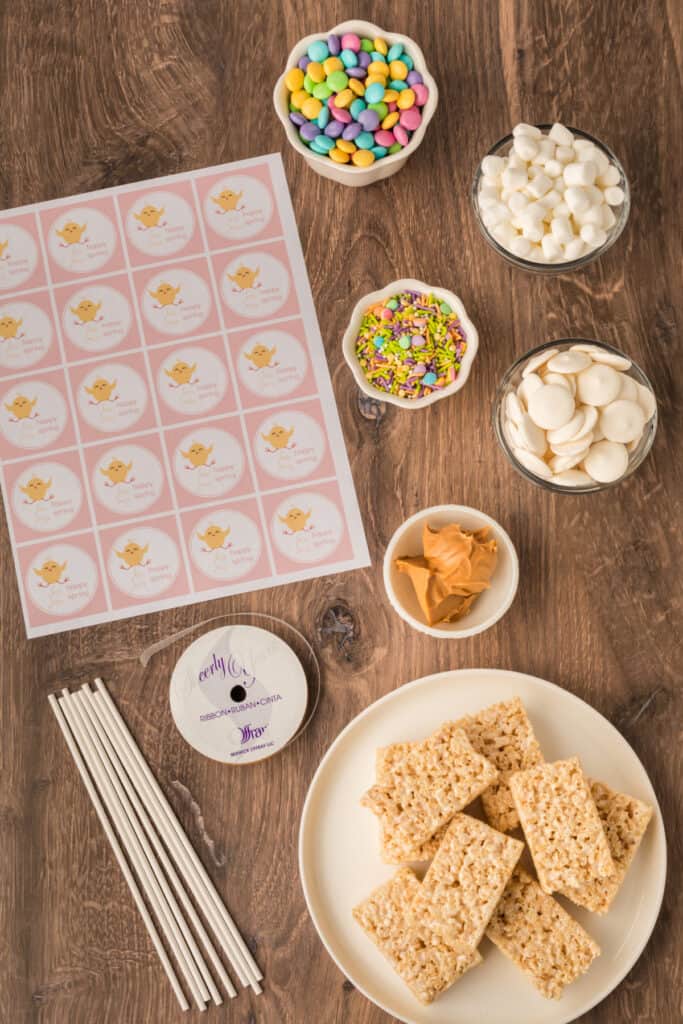
🛒 Ingredients & Substitutions
- Rice Krispies Treats – store-bought or homemade. Use homemade Rice Krispies if you prefer from-scratch.
- peanut butter – Swap with almond butter or sunflower seed butter for allergies.
- mini marshmallows
- white candy melts – Try colored candy melts to match any holiday or party theme.
- Confetti sprinkles
- Spring-colored M&M’s
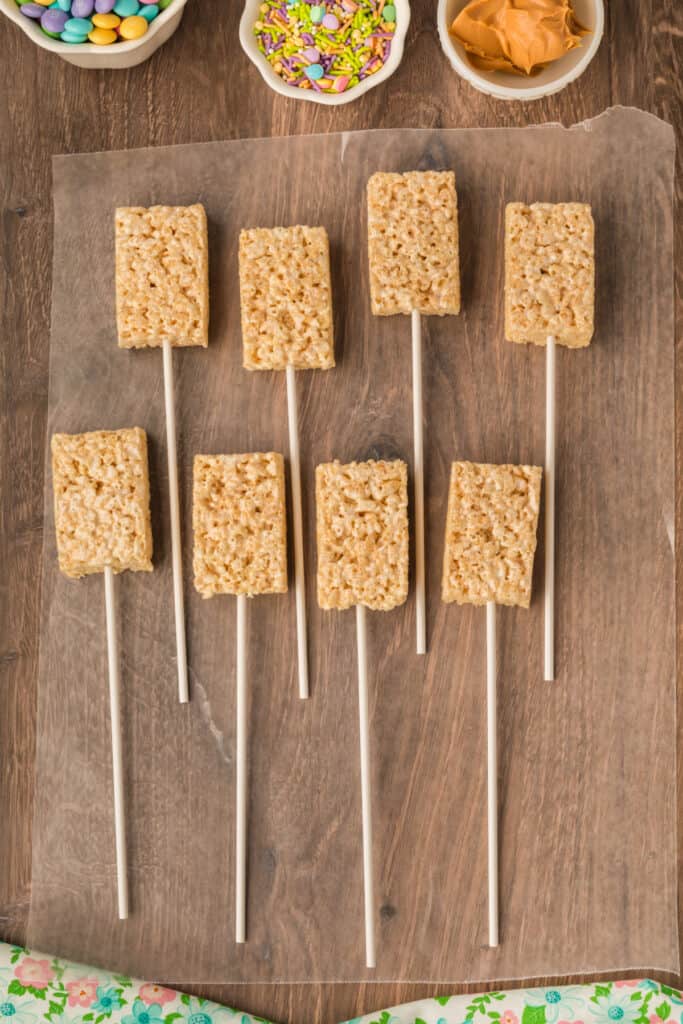
- 8 long lollipop sticks
- waxed paper
- free printable circles – see the link below. (optional, for decoration)
- ribbon (optional, for tying bows)
✨ Variations
- Use chocolate candy melts instead of white
- Add pastel jelly beans instead of M&M’s
- Drizzle with colored icing for extra flair

🔥 Tips For Success
- Let each layer set before adding the next
- Use waxed paper to prevent sticking
- Push lollipop sticks in slowly to avoid breaking the treats
Would you like to save this?
❓ FAQs
Store in an airtight container at room temperature for up to 3 days. Keep them in a single layer to avoid smudging the decorations.
You can, but it adds flavor and helps the marshmallow layer stick better.
Absolutely – just chop them into smaller pieces to melt evenly.
Use a microwave-safe bowl and heat in 30-second intervals, stirring in between. Do not overheat – low and slow is key for smooth candy coating.
Freezing is not recommended, as it can change the texture of the treats and candy coating. They’re best enjoyed fresh or within a few days.
No problem! You can use paper straws, wooden skewers (with tips trimmed), or serve them as handheld bars.
Make sure the stick is inserted firmly, and give the treats a few minutes to firm up before dipping or decorating.
Definitely! Try chocolate, strawberry, or any seasonal flavors for a fun twist.

🍽️ Other Recipes You May Enjoy

Spring Rice Krispies Treats Pops
Would you like to save this?
Equipment
- wax paper
- 8 long lollipop sticks
- free printable optional
- ribbon optional
Ingredients
- 1 box Rice Krispies Treats, 8 pack, unwrapped
- 2 tablespoons peanut butter
- 1 cup mini marshmallows
- 1 cup white candy melts
- confetti sprinkles
- spring or pastel colored M&M’s Milk Chocolate candies
Instructions
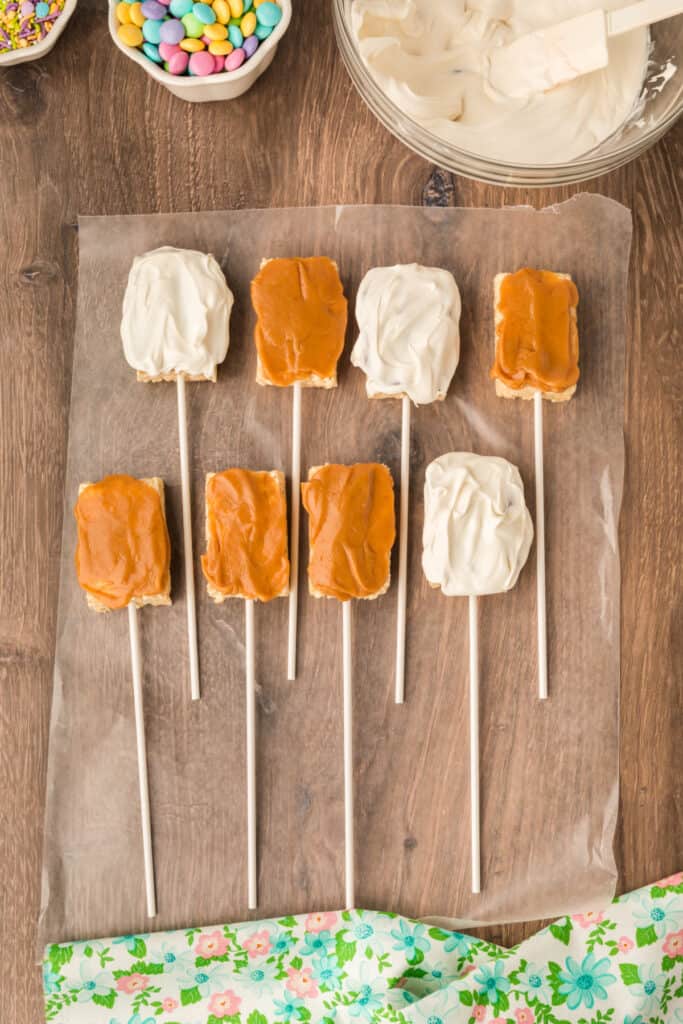
- Prep the Treats: Lay out waxed paper long enough to hold all Rice Krispies Treats without them touching. Insert one lollipop stick into each treat and place them on the waxed paper.
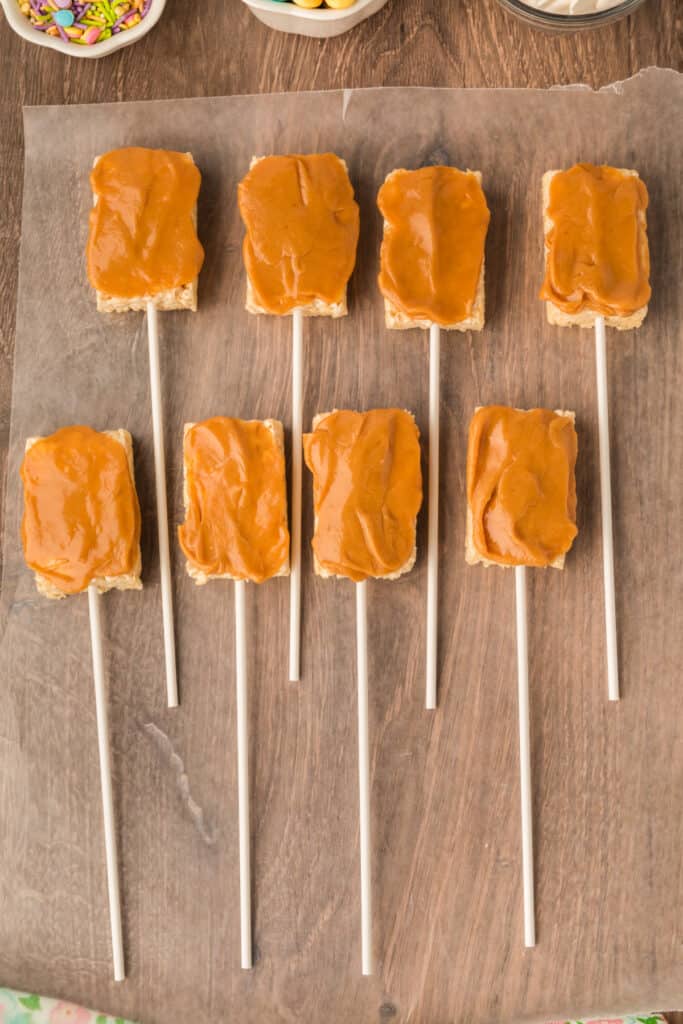
- Make the Marshmallow Coating: In a small saucepan, heat the peanut butter and mini marshmallows over low heat. Stir occasionally until completely melted and smooth. Remove from heat.
- Coat with Marshmallow: Use a spatula to spread the marshmallow mixture on the front side of each Rice Krispies Treat. Return each one to the waxed paper and let them cool slightly.
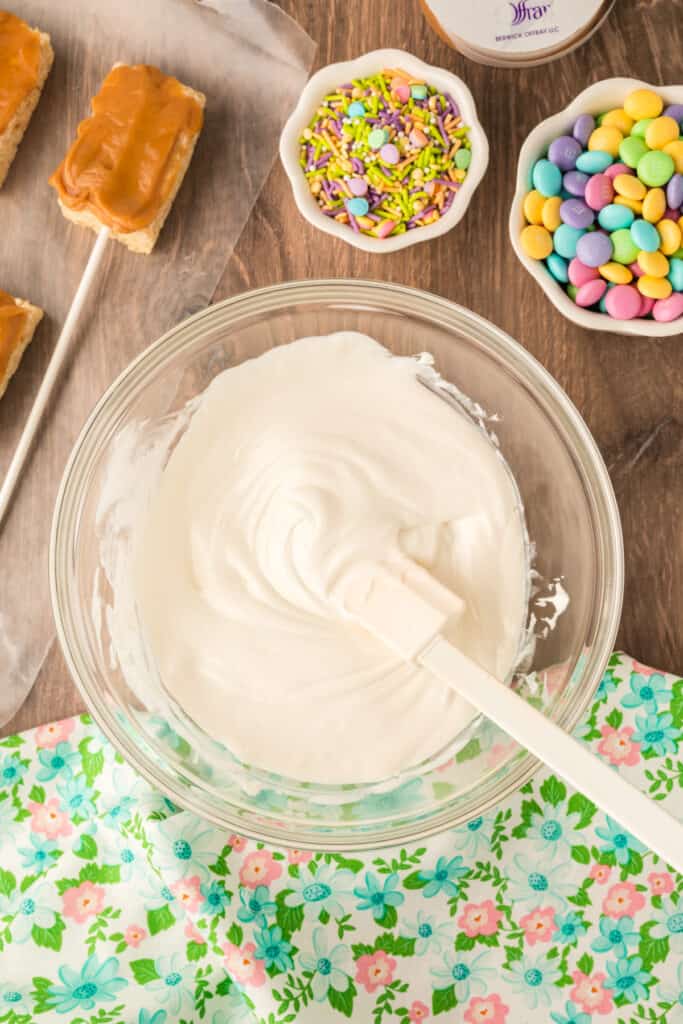
- Add the Candy Layer: Melt the white candy melts in a microwave-safe bowl according to package directions. With a spoon or pastry brush, coat the marshmallow-covered side of each treat. Let the excess drip down the sides.
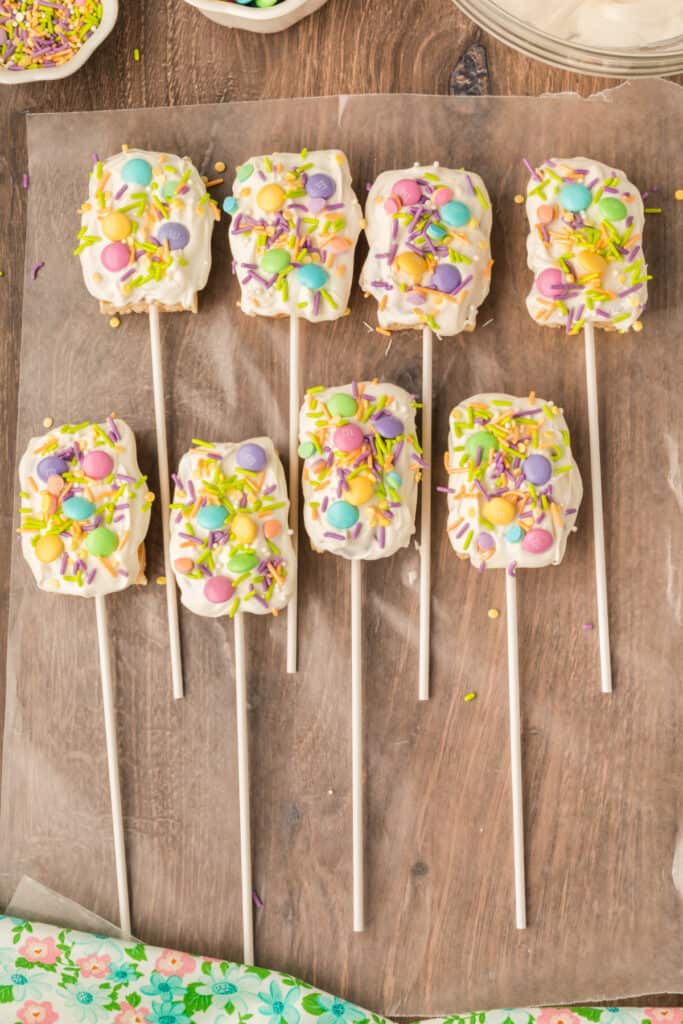
- Decorate: Immediately top with confetti sprinkles and spring-colored M&M’s. Let everything set completely.
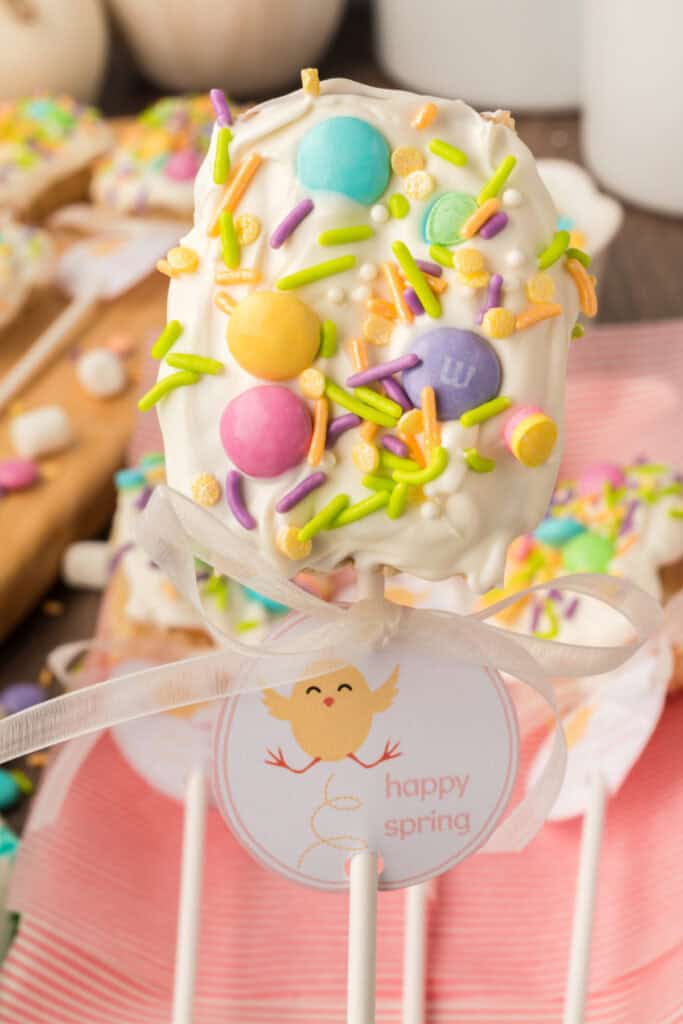
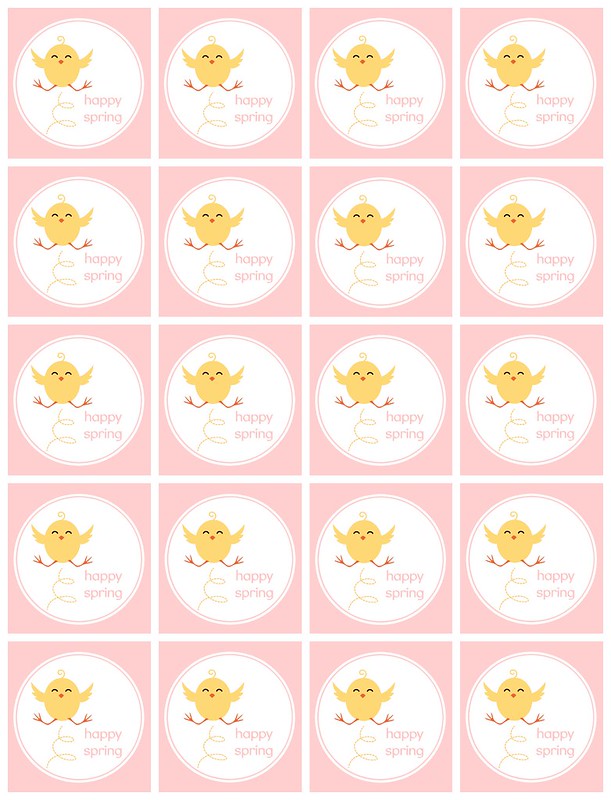
- Add Final Touches: Cut out the printable circles, punch a hole at the top and bottom, and slide them onto each lollipop stick. Tie a ribbon into a small bow just above the circle for a festive touch.
Notes
- Chocolate Rice Krispie treats would also be delicious.
- Melt the peanut butter and marshmallows low and slow to avoid burning.
- Decorate immediately after coating so toppings stick well.
- Add printable tags and ribbon for cute Easter gifting!
- Store in an airtight container at room temperature for up to 3 days. Keep them in a single layer to avoid smudging the decorations.
Nutrition
Nutrition information is automatically calculated, so should only be used as an approximation.
Originally published on March 23, 2015. Updated on March 27, 2025.


Such a cute idea for Easter!
What a fun idea! I'd love to relieve some stress by indulging in one of these! #client